Stack for this site
BTW, this site is powered by the OrangePi5+. I am using Django web framework, served by Gunicorn/Apache, on Armbian/Debian. I expose my server to the www through a Cloudflare secure tunnel.

Cloudflare
Apache * Gunicorn
Armbian * Debian * OrangePi
Sept. 9, 2024, 7:45 a.m.
#Cloudflare #Armbian #Debian #OrangePi5+ #Gunicorn #Apache #Django
CompTIA A+ Certified
I haven't done any updates for a while because I have been studying. I am now CompTIA A+ Certified!

Link Below to verify Certificate
http://verify.CompTIA.org
verification code: DDQ1W73TMEQ41K3K
July 28, 2024, 3:51 p.m.
#A+ #CompTIA #CompTIA A+
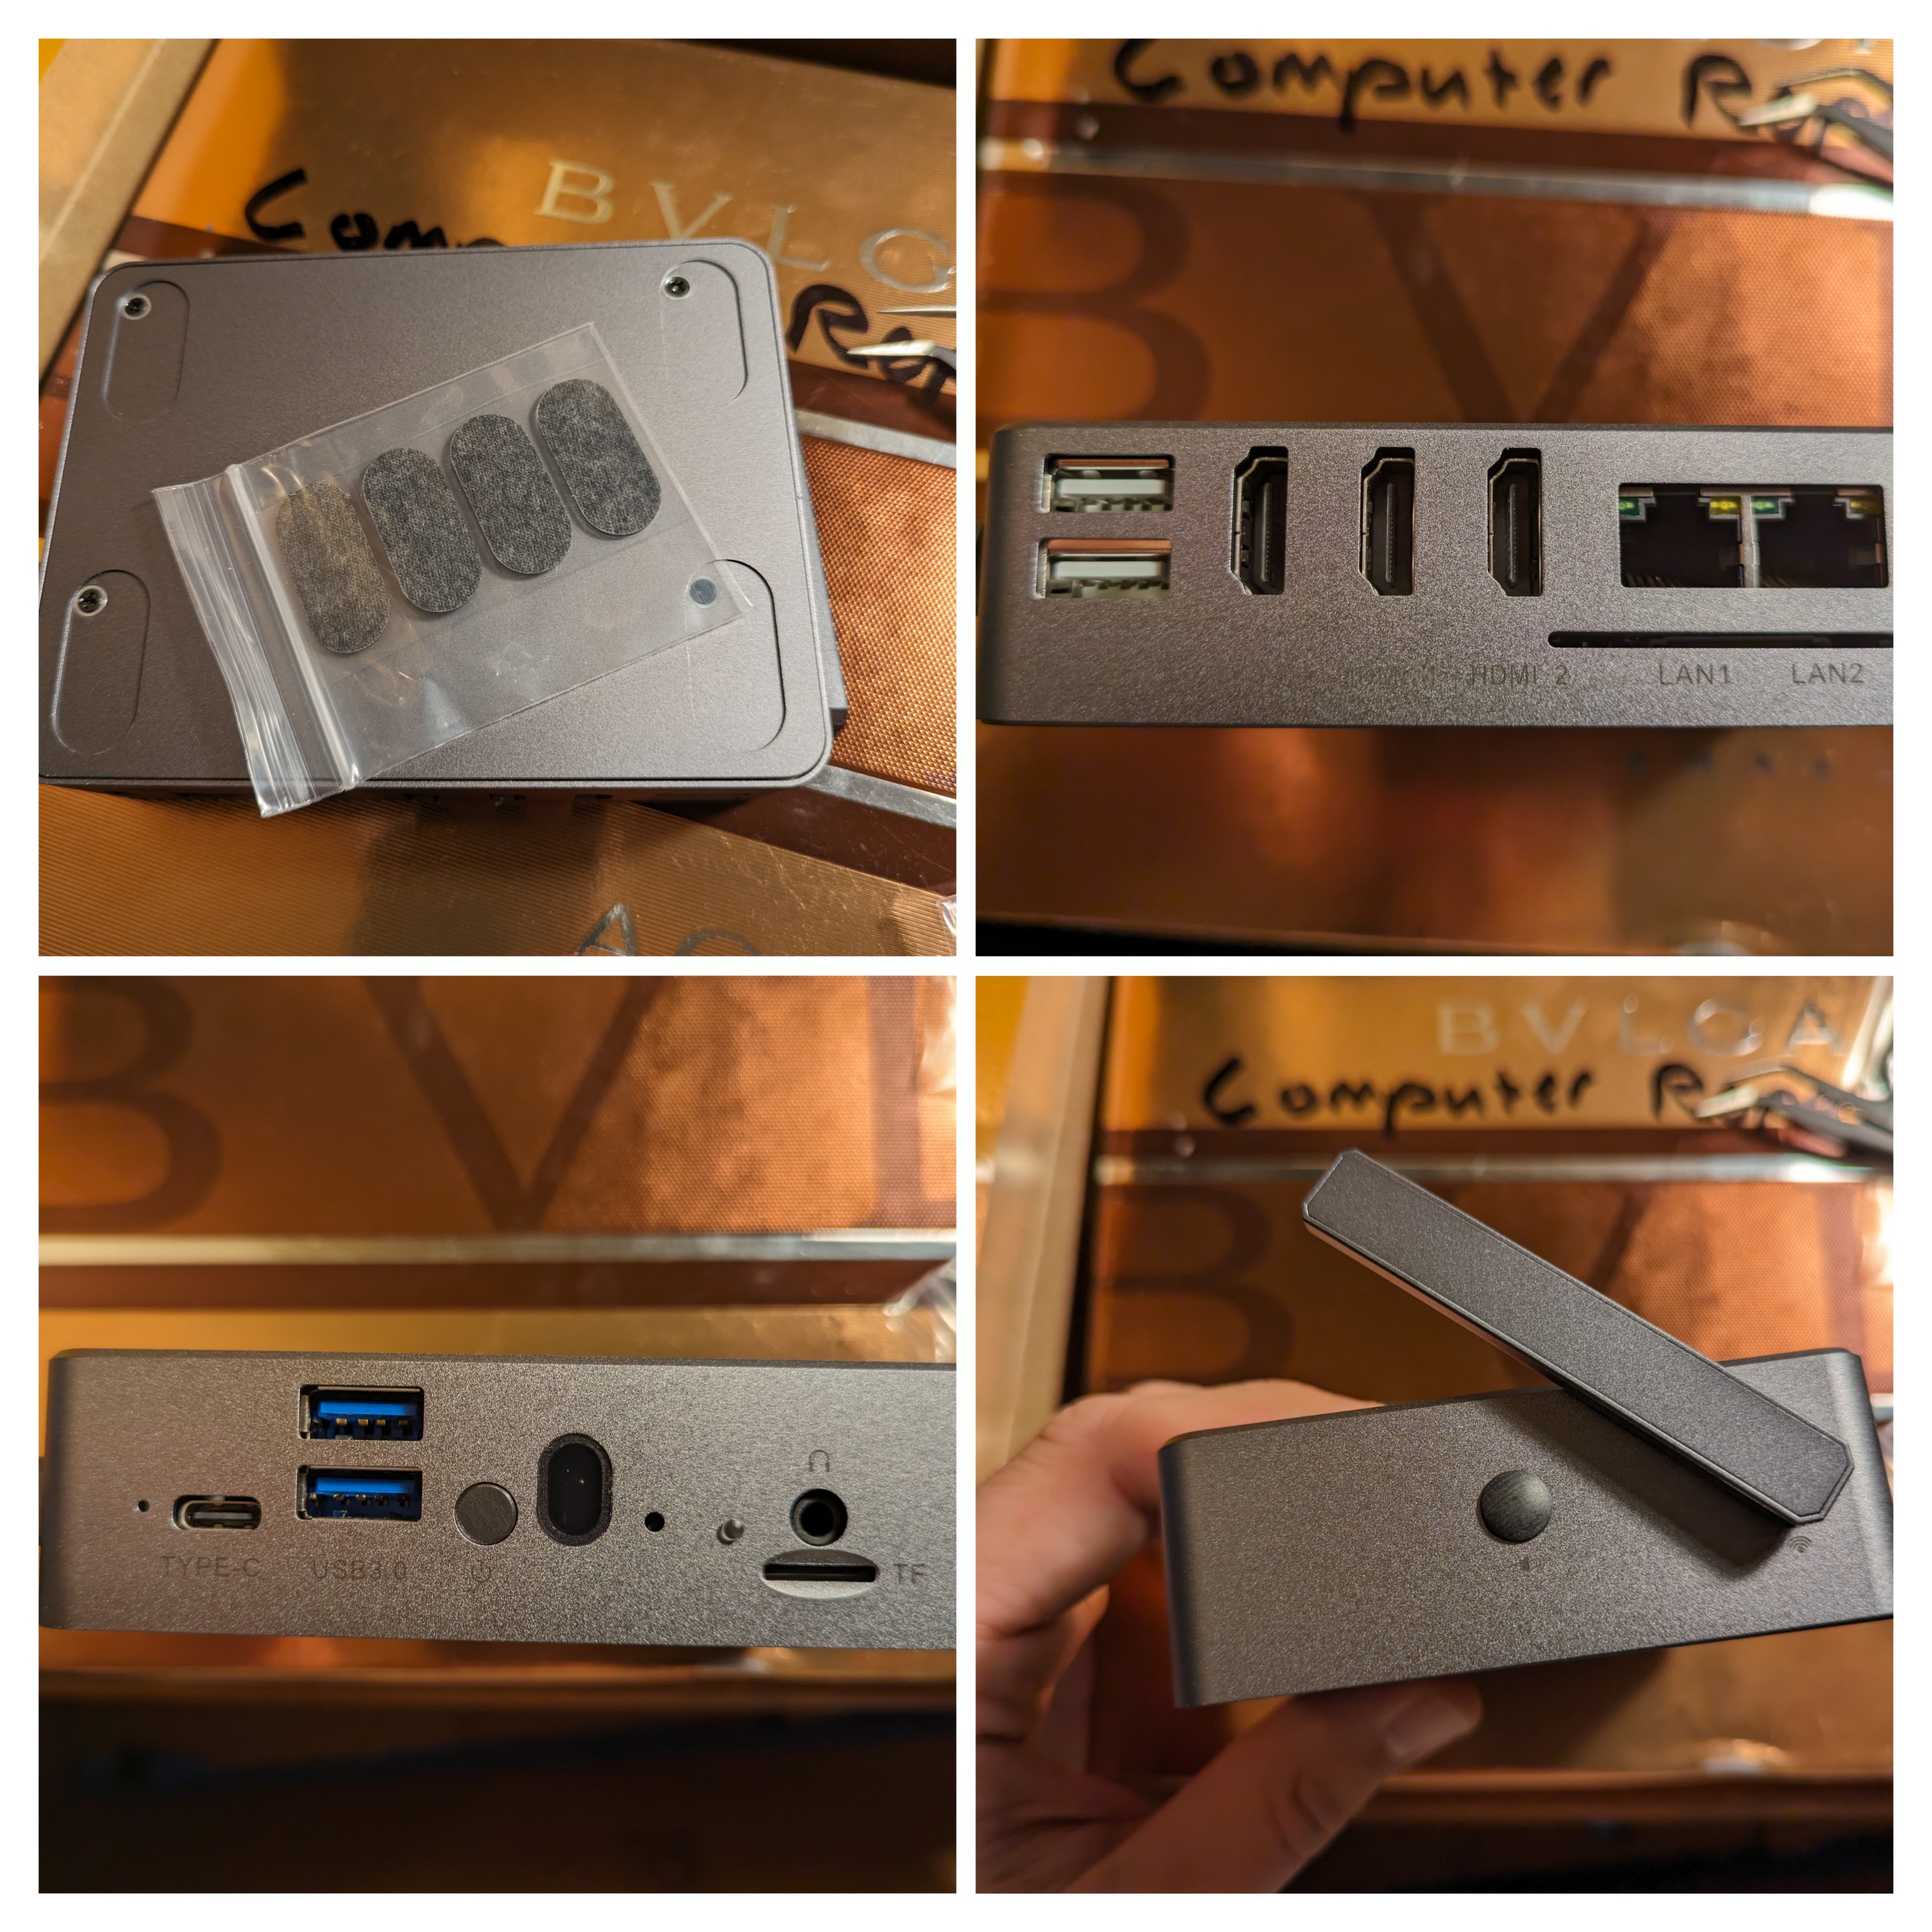
OrangePi 5+ Assembly step 9 and notes
Wait until you've got things working and running properly before you stick to the rubber feet on the bottom. Otherwise, if anything is wrong you just have to peel them off again to access the screws.
It's time to plugin the power supply, insert a TF card with a live linux OS and see what happens!
OrangePi 5+ boot priority is the TF card (micro SD). NVME seems to be 2nd boot priority. It will boot from the USB 2.0 on the back, not the USB 3.0.
Feb. 15, 2024, 6:50 p.m.
#OrangePi5+
OrangePi 5+ Assembly step 8
The plastic window goes on the case where you see the inset for it. The brown pad covers the adhesive. Peel it off and put the adhesive side facing the case.
The Clear plug goes in the small hole next to the headphone jack.
I used a small pair of tweezers to hold it in place while I pushed it in with my finger.
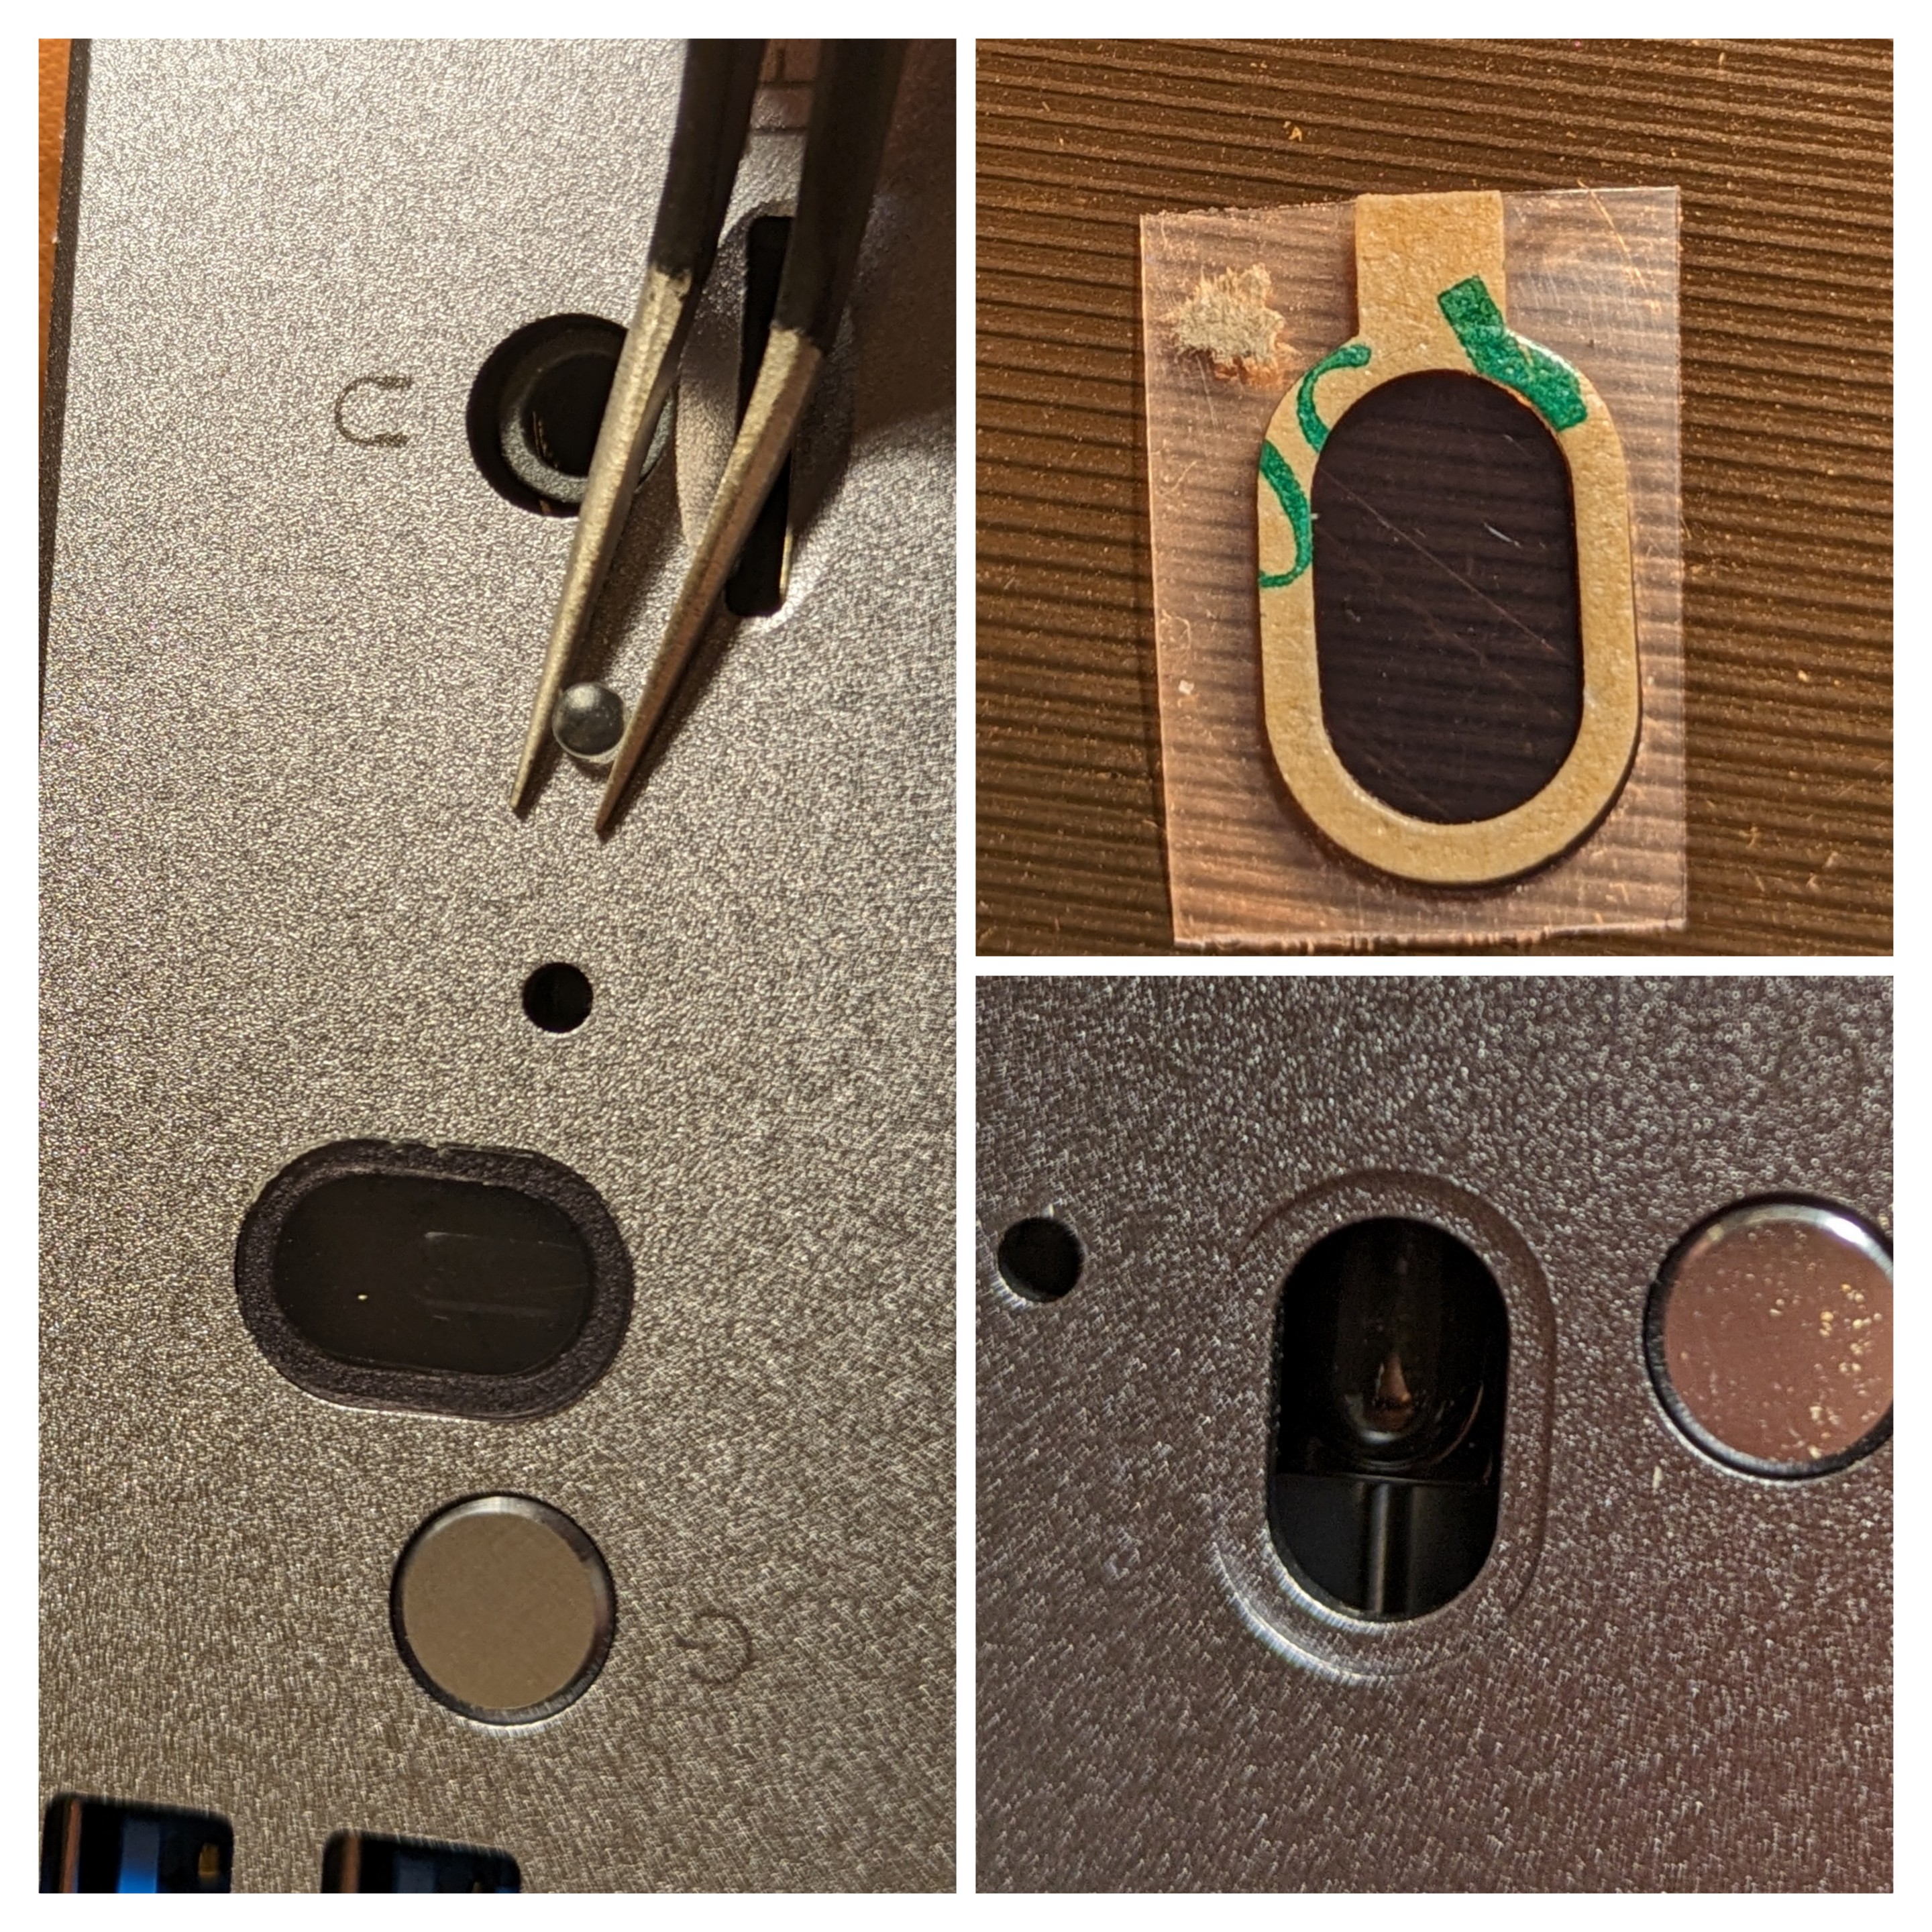
Placing the plastic window, and the plastic plug (led cover)
Feb. 15, 2024, 12:37 p.m.
#OrangePi5+
OrangePi 5+ Assembly step 7
Just before you close up the case, slip the power button into place since this is inserted from the inside. Make sure the holes on the bottom plate line up with the holes in the board motherboard and insert the screws.

a close up view of the power button
Feb. 15, 2024, 11:56 a.m.
#OrangePi5+
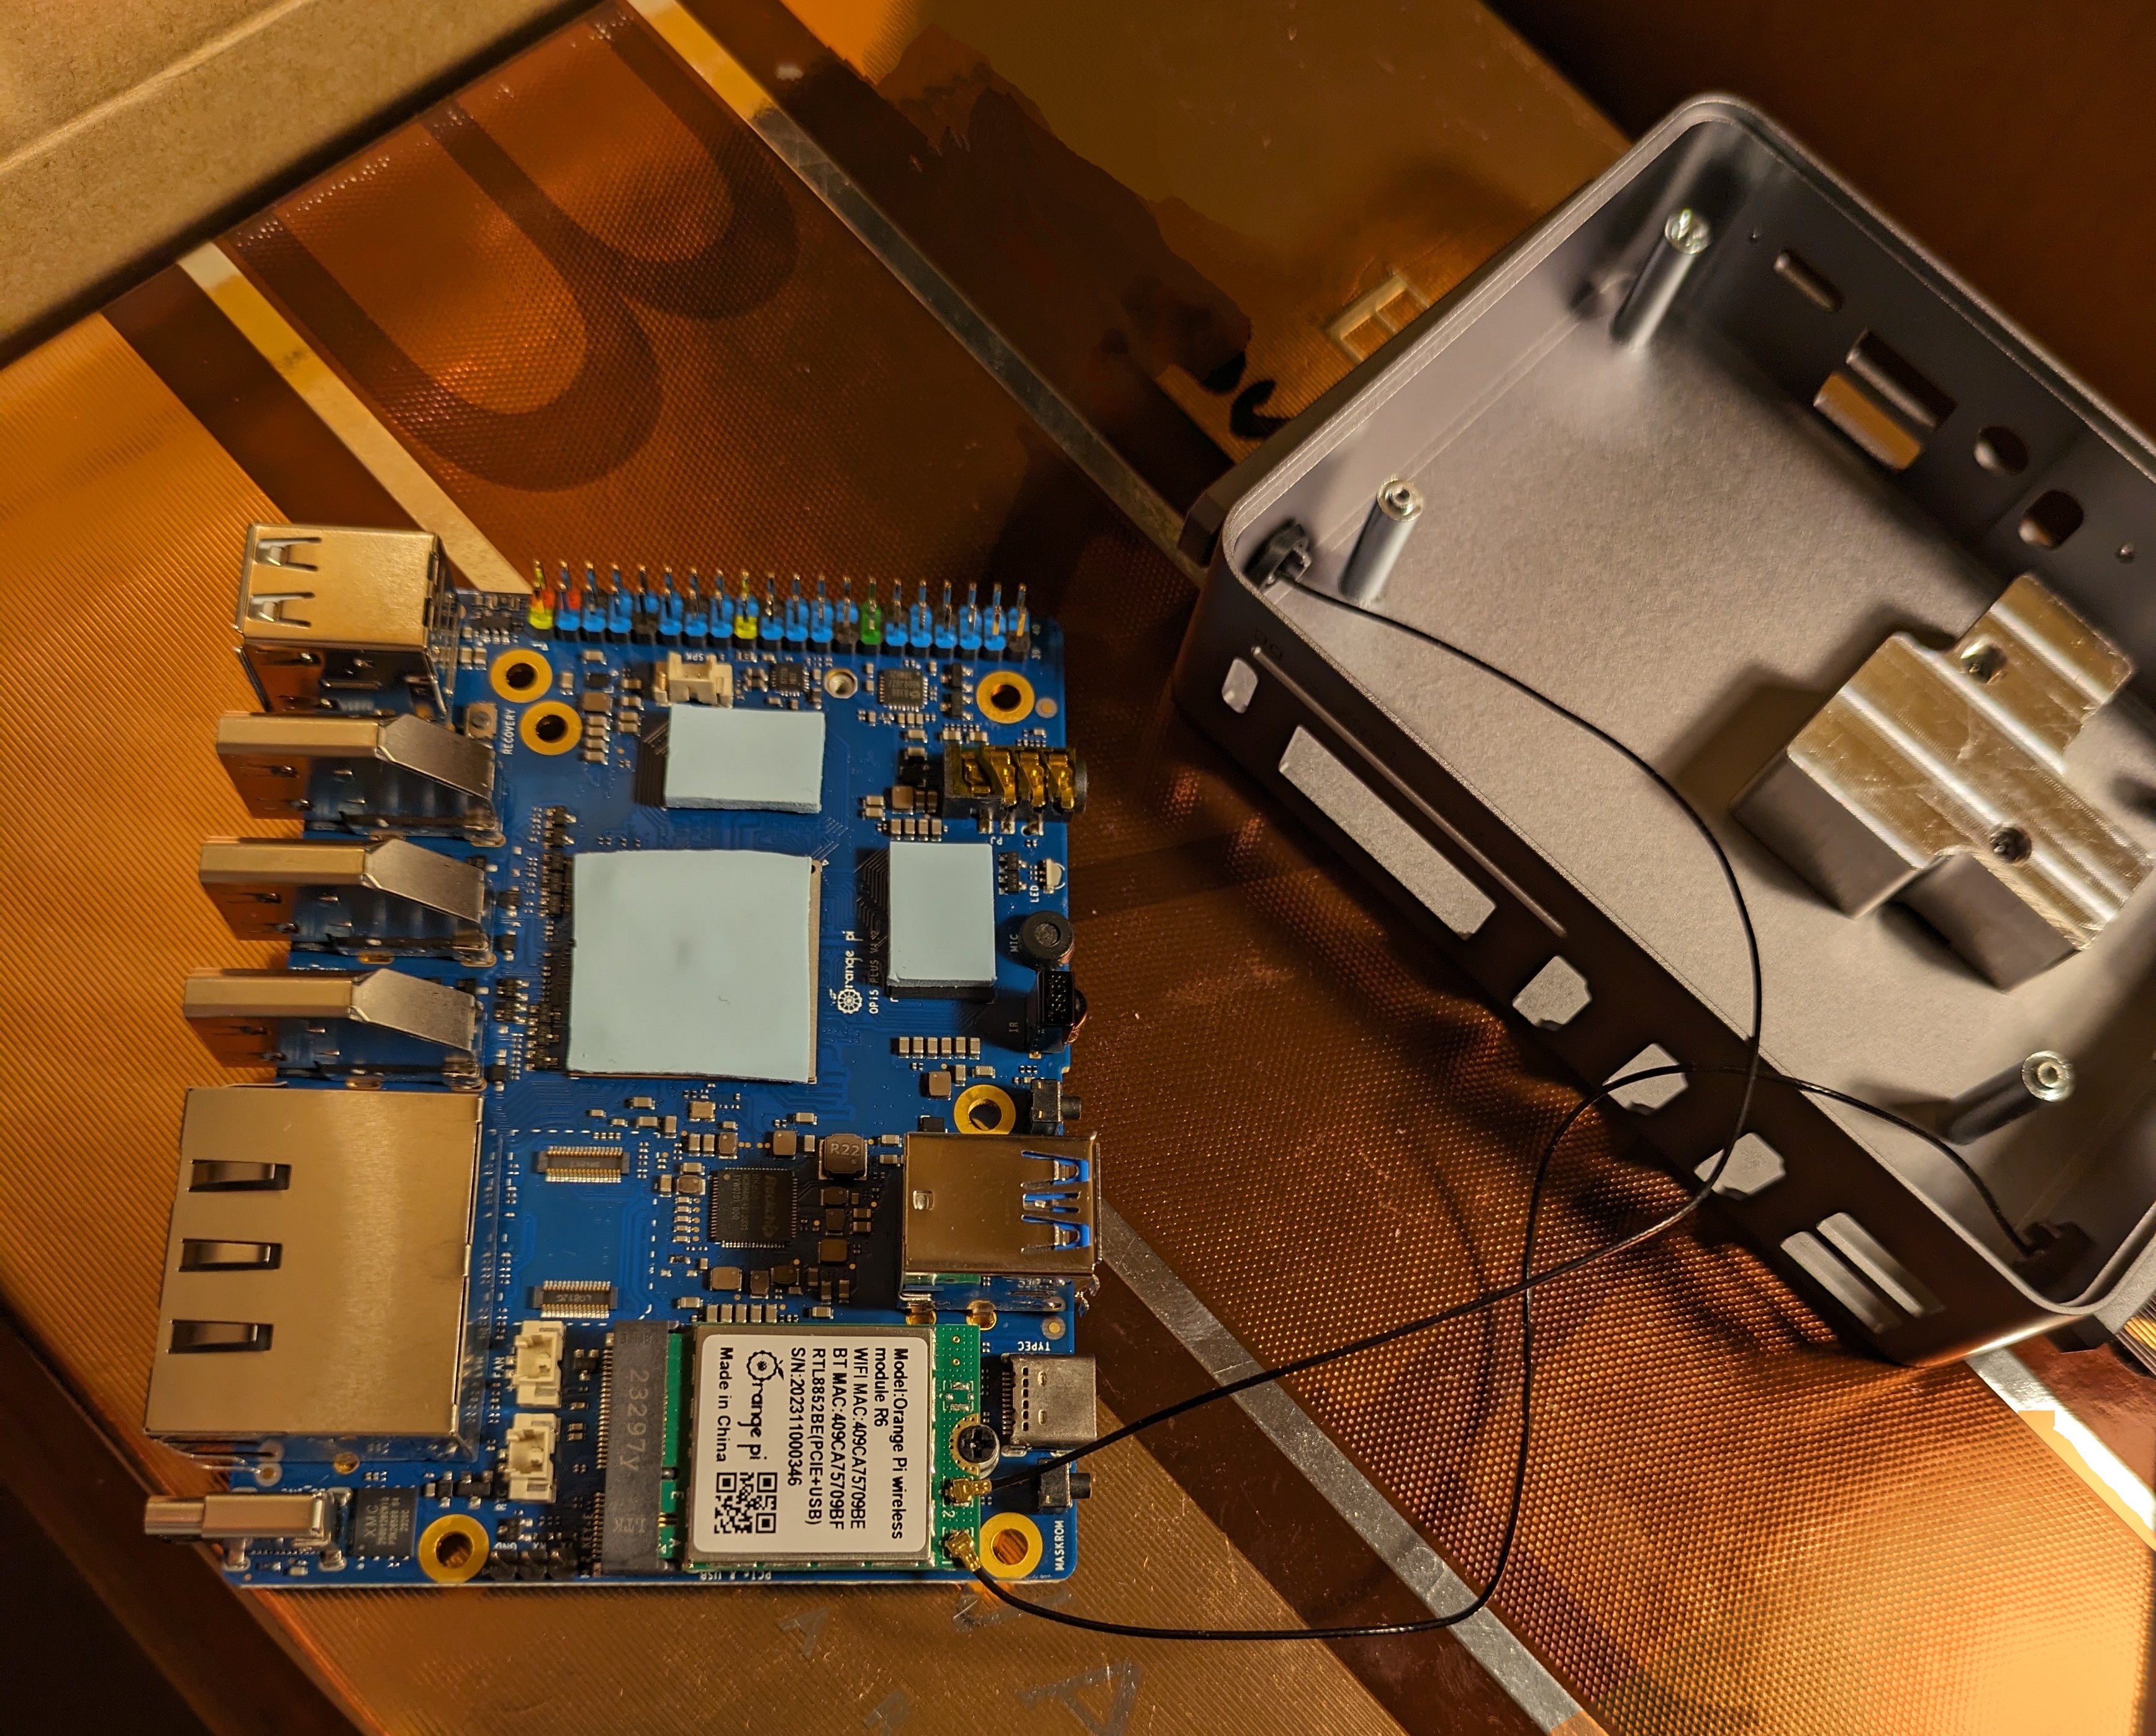
OrangePi 5+ (16GB RAM) Notes
Before we get started, some notes...
I bought the OrangePi 5+ (16GB RAM) board, the aluminum case and the WiFi module. Also I bought a 1TB NVME ssd to use as the main drive after setup. (I already had microSD card and a suitable power supply. You will need these too if you don't already have them.)
The case comes with Wi-Fi antennae, but you need to buy the WiFi/Bluetooth module if you want that functionality. Otherwise you will only have network access via ethernet, which may be completely fine depending on what you are using it for.
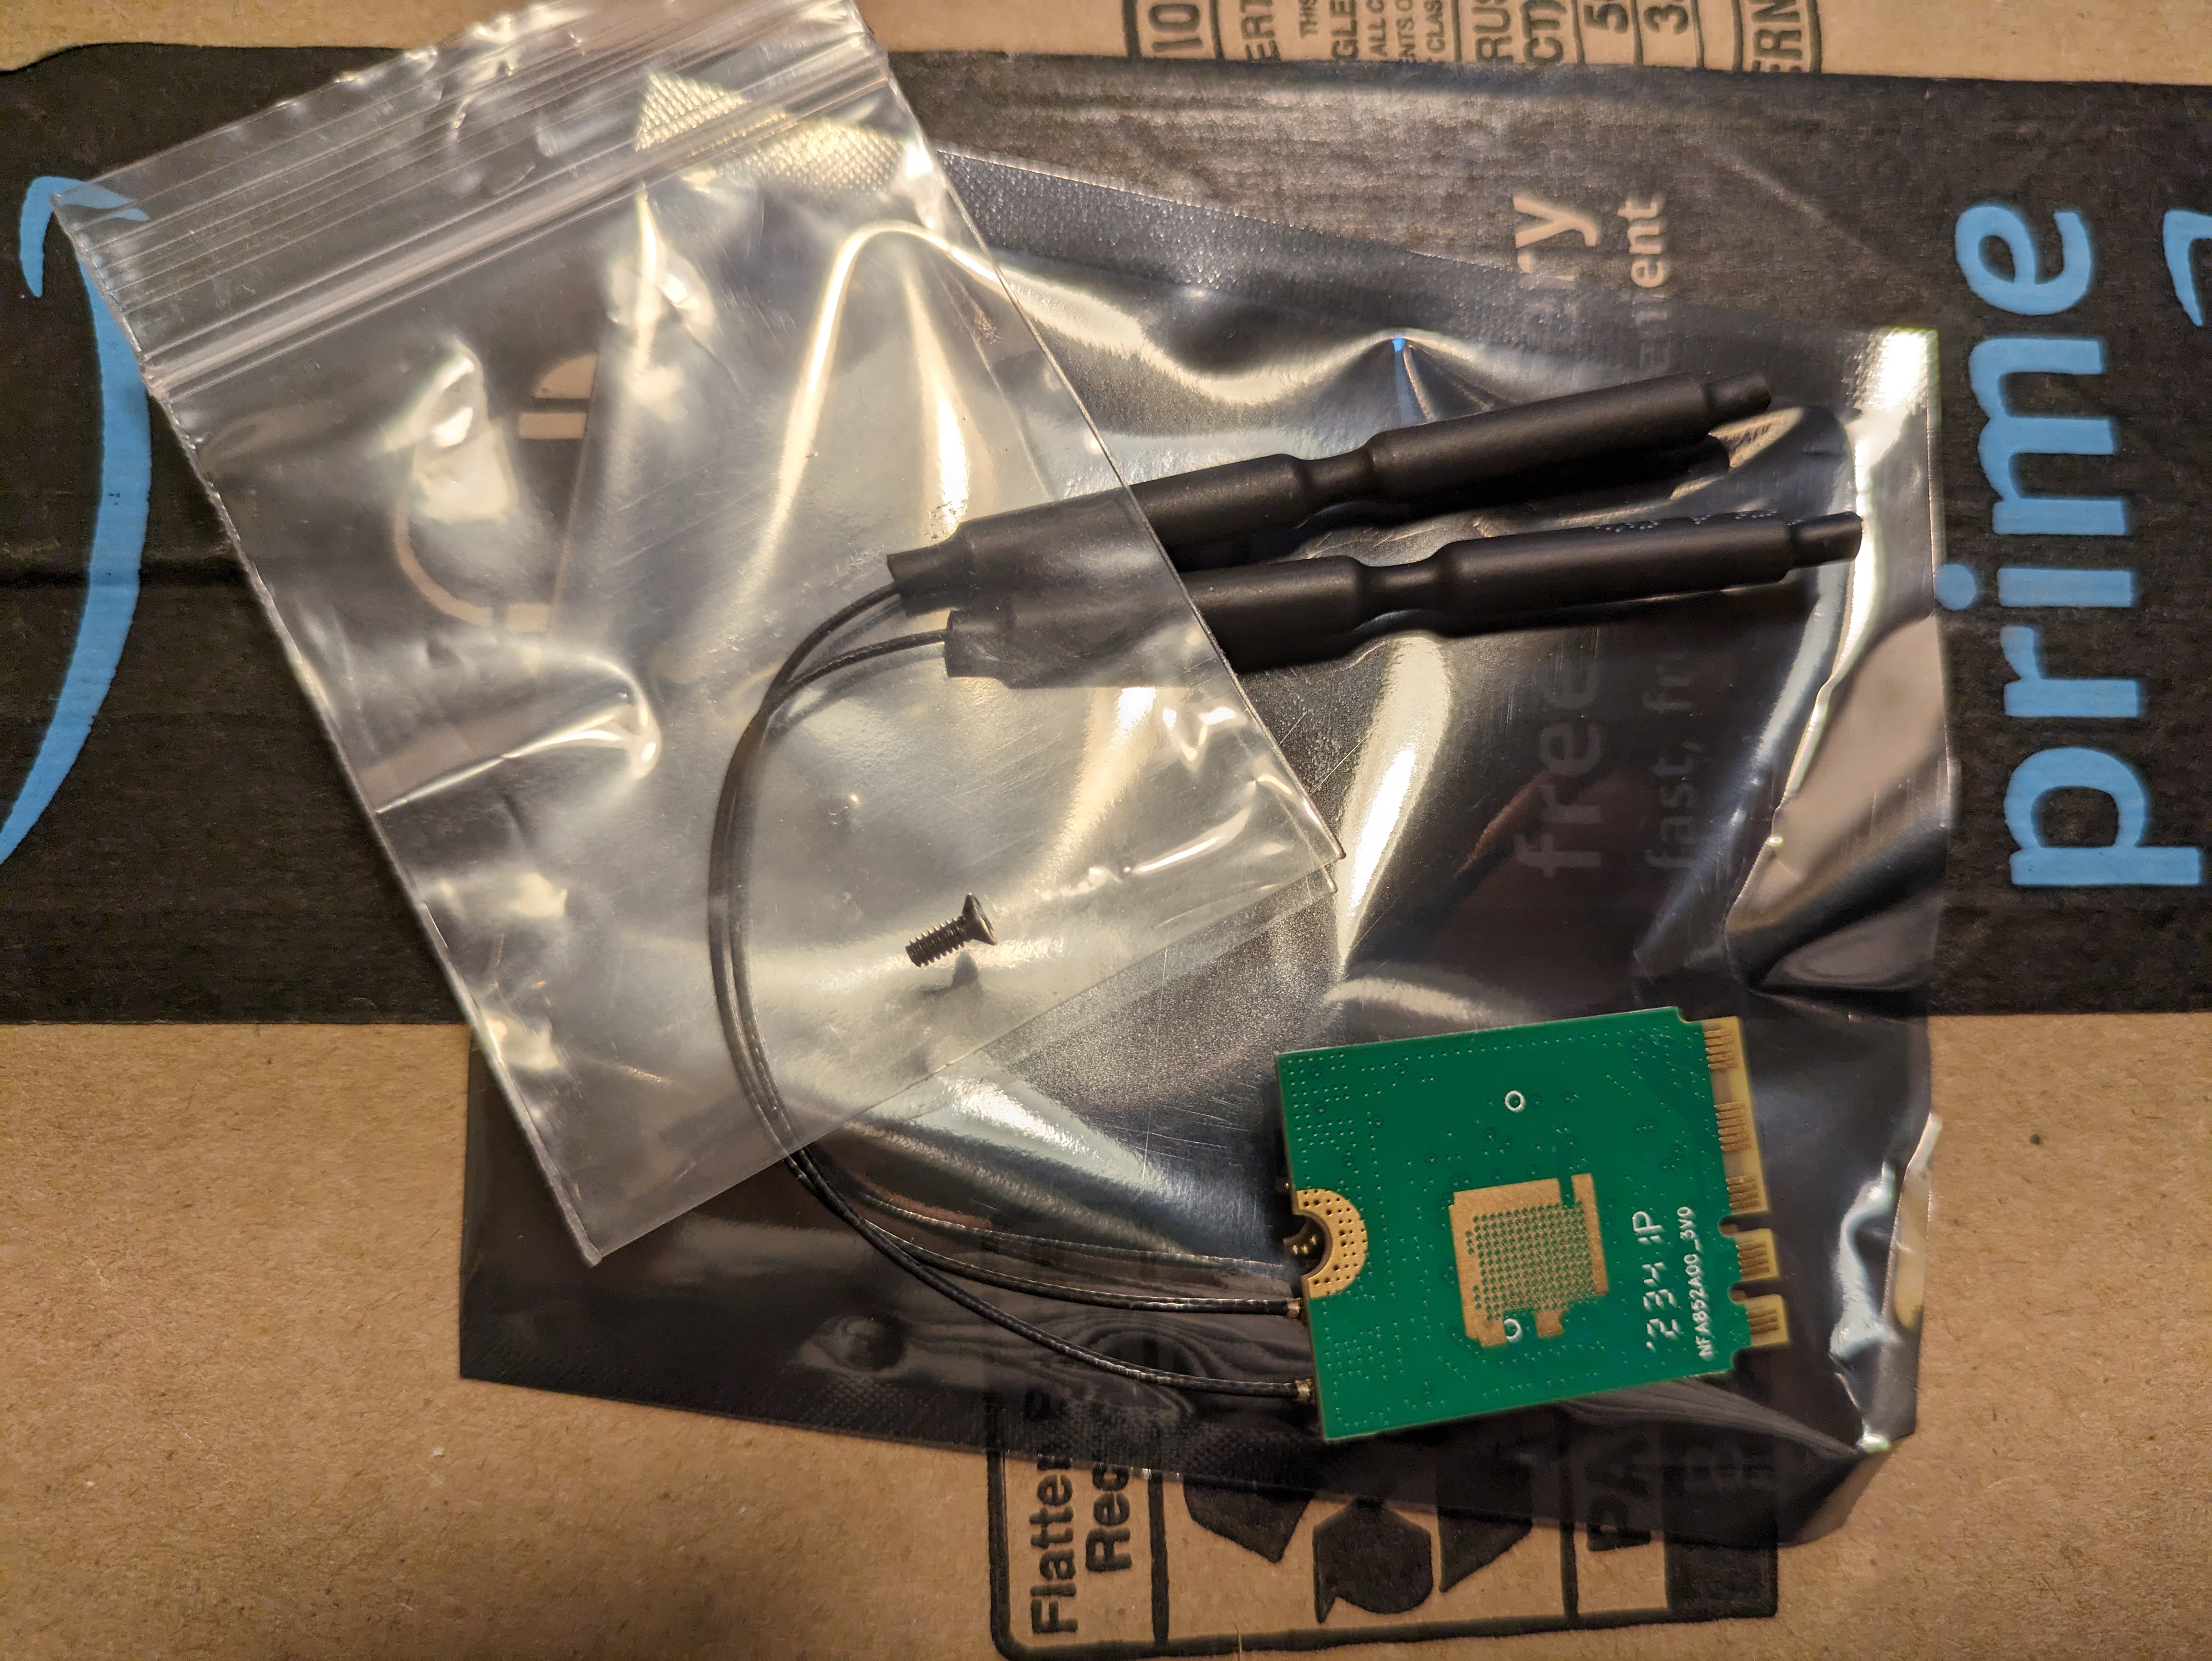
WiFi/Bluetooth Module
Aluminum Case
WiFi module
Feb. 5, 2024, 4:51 p.m.
#OrangePi5+
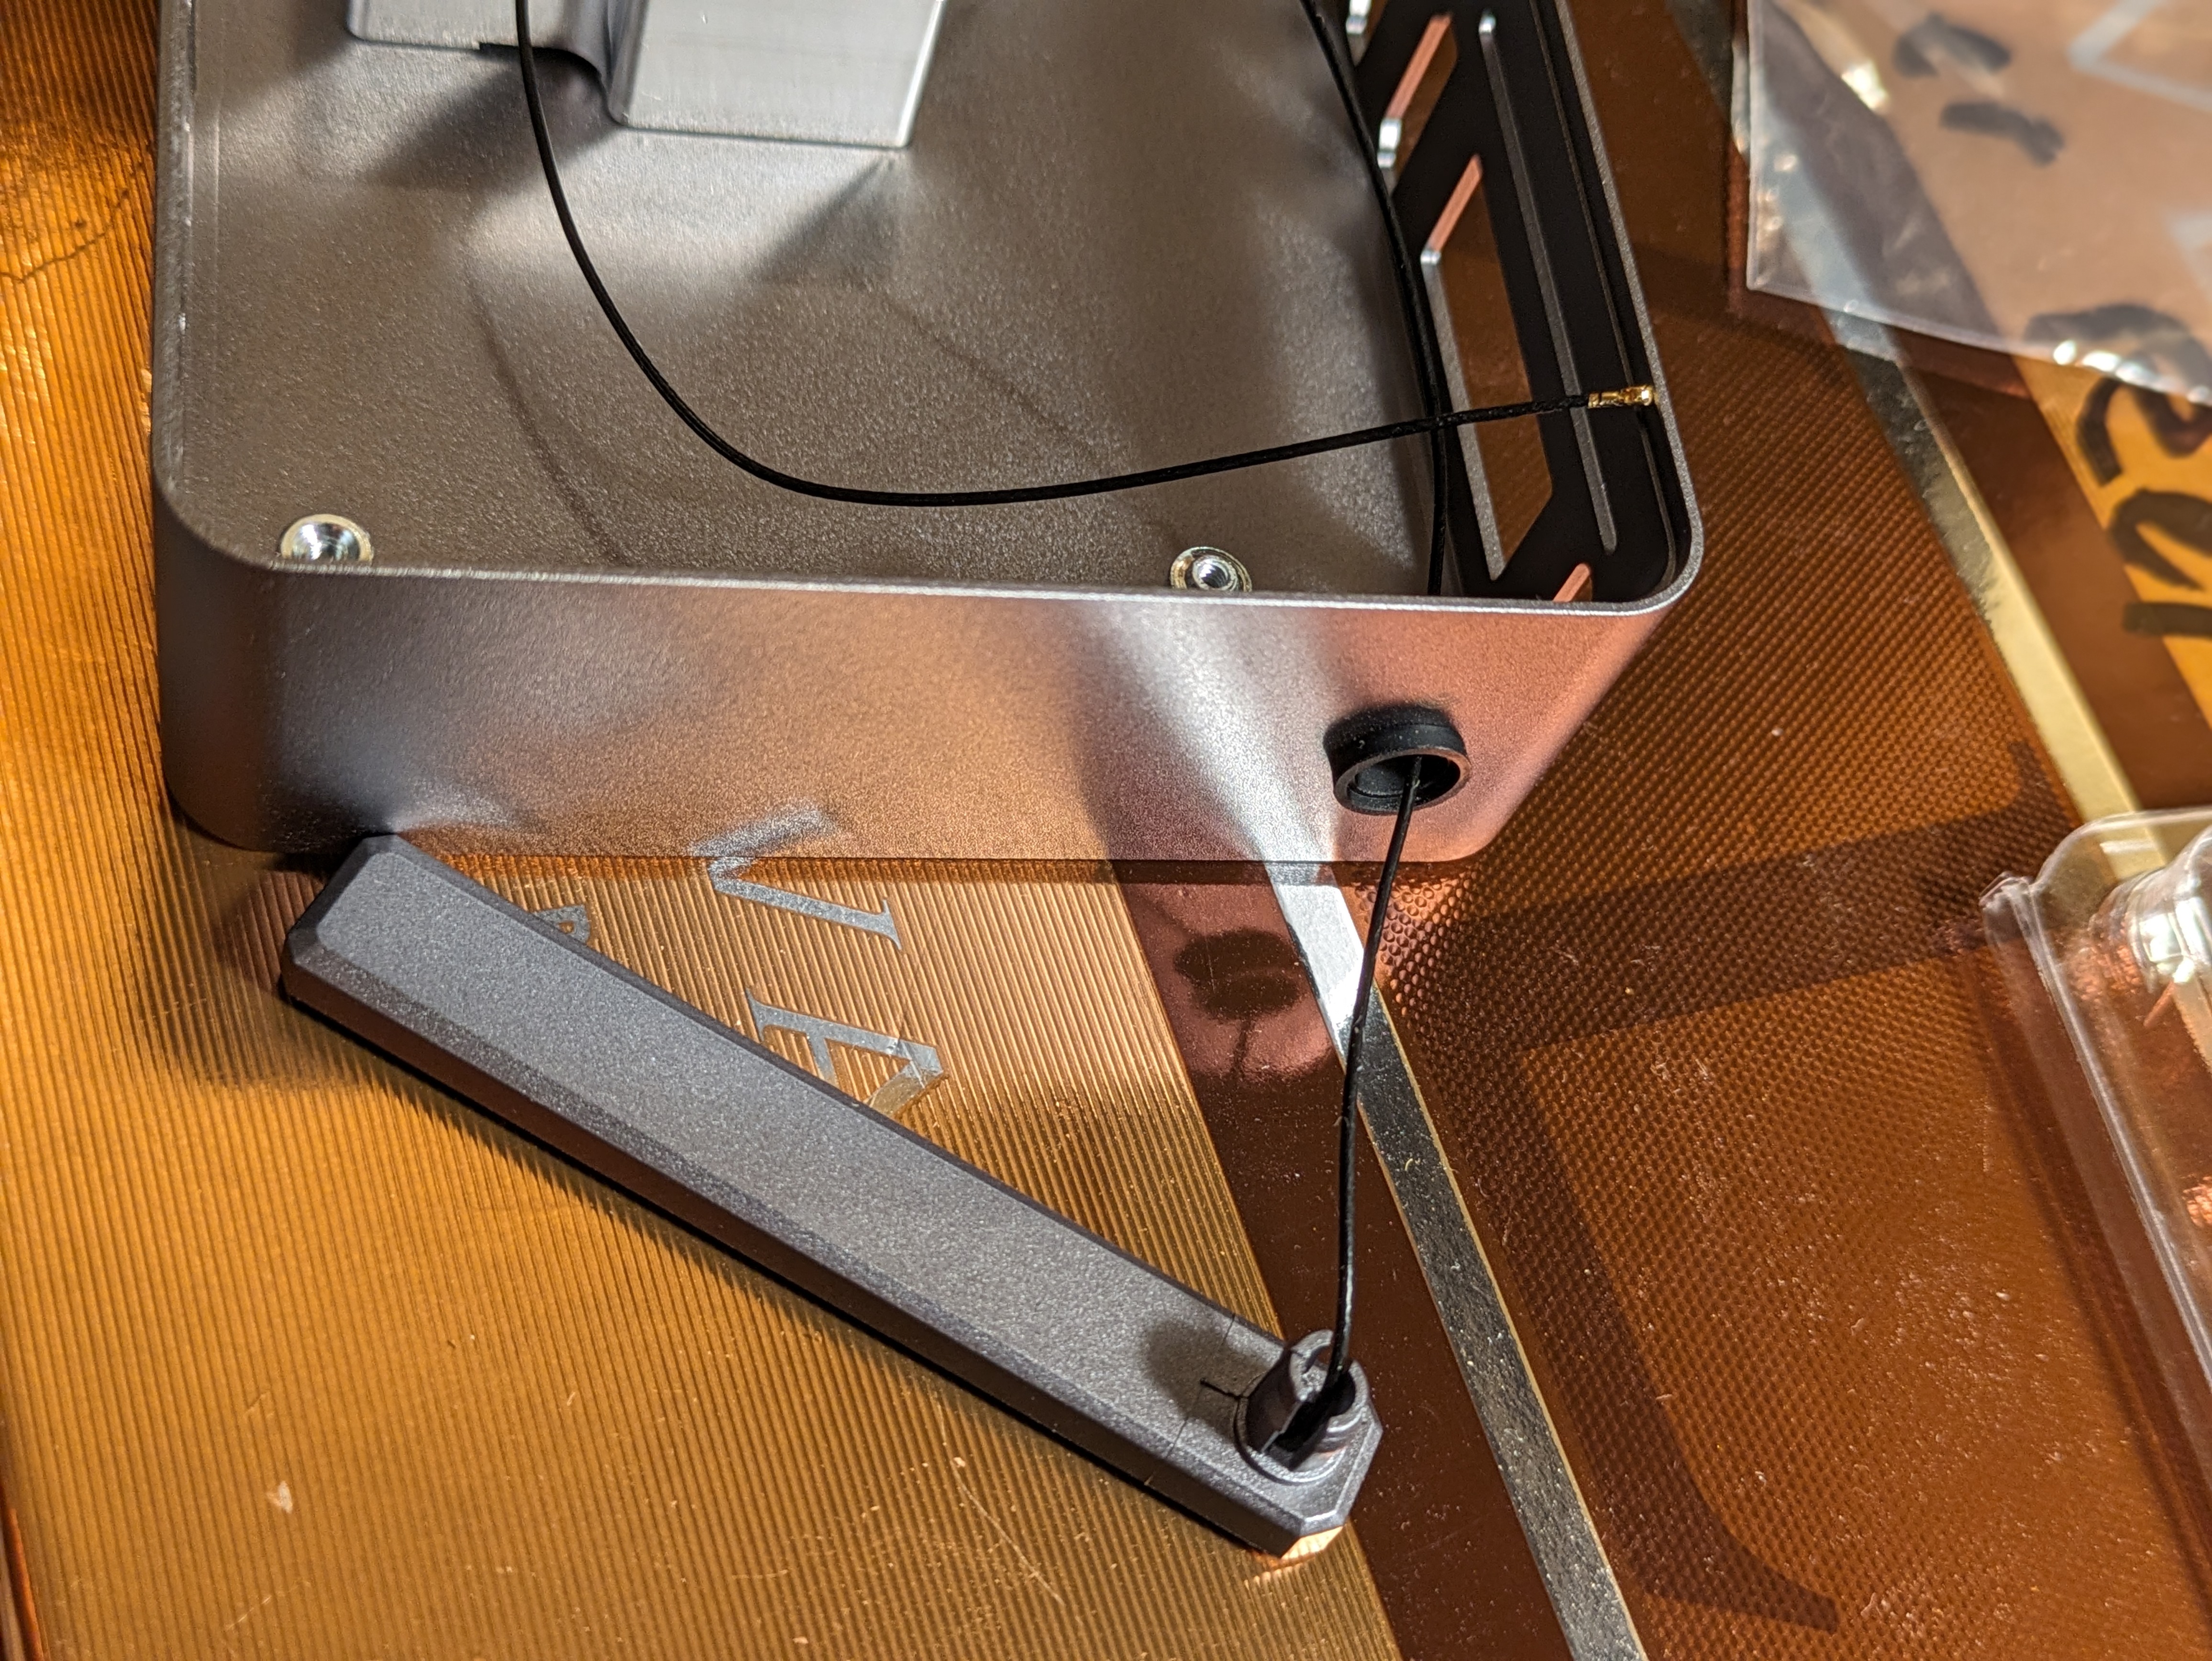
OrangePi 5+ Assembly step 1
Place the rubber grommet into the holes where the antennae will attach, then feed the antenna wire into each hole and snap each antenna into place.
Feb. 5, 2024, 4:51 p.m.
#OrangePi5+
OrangePi 5+ Assembly step 4
AFTER you have snapped the Wi-Fi wires into place, you can insert the module. Insert at an angle, then push down and affix into place with the provided screw.
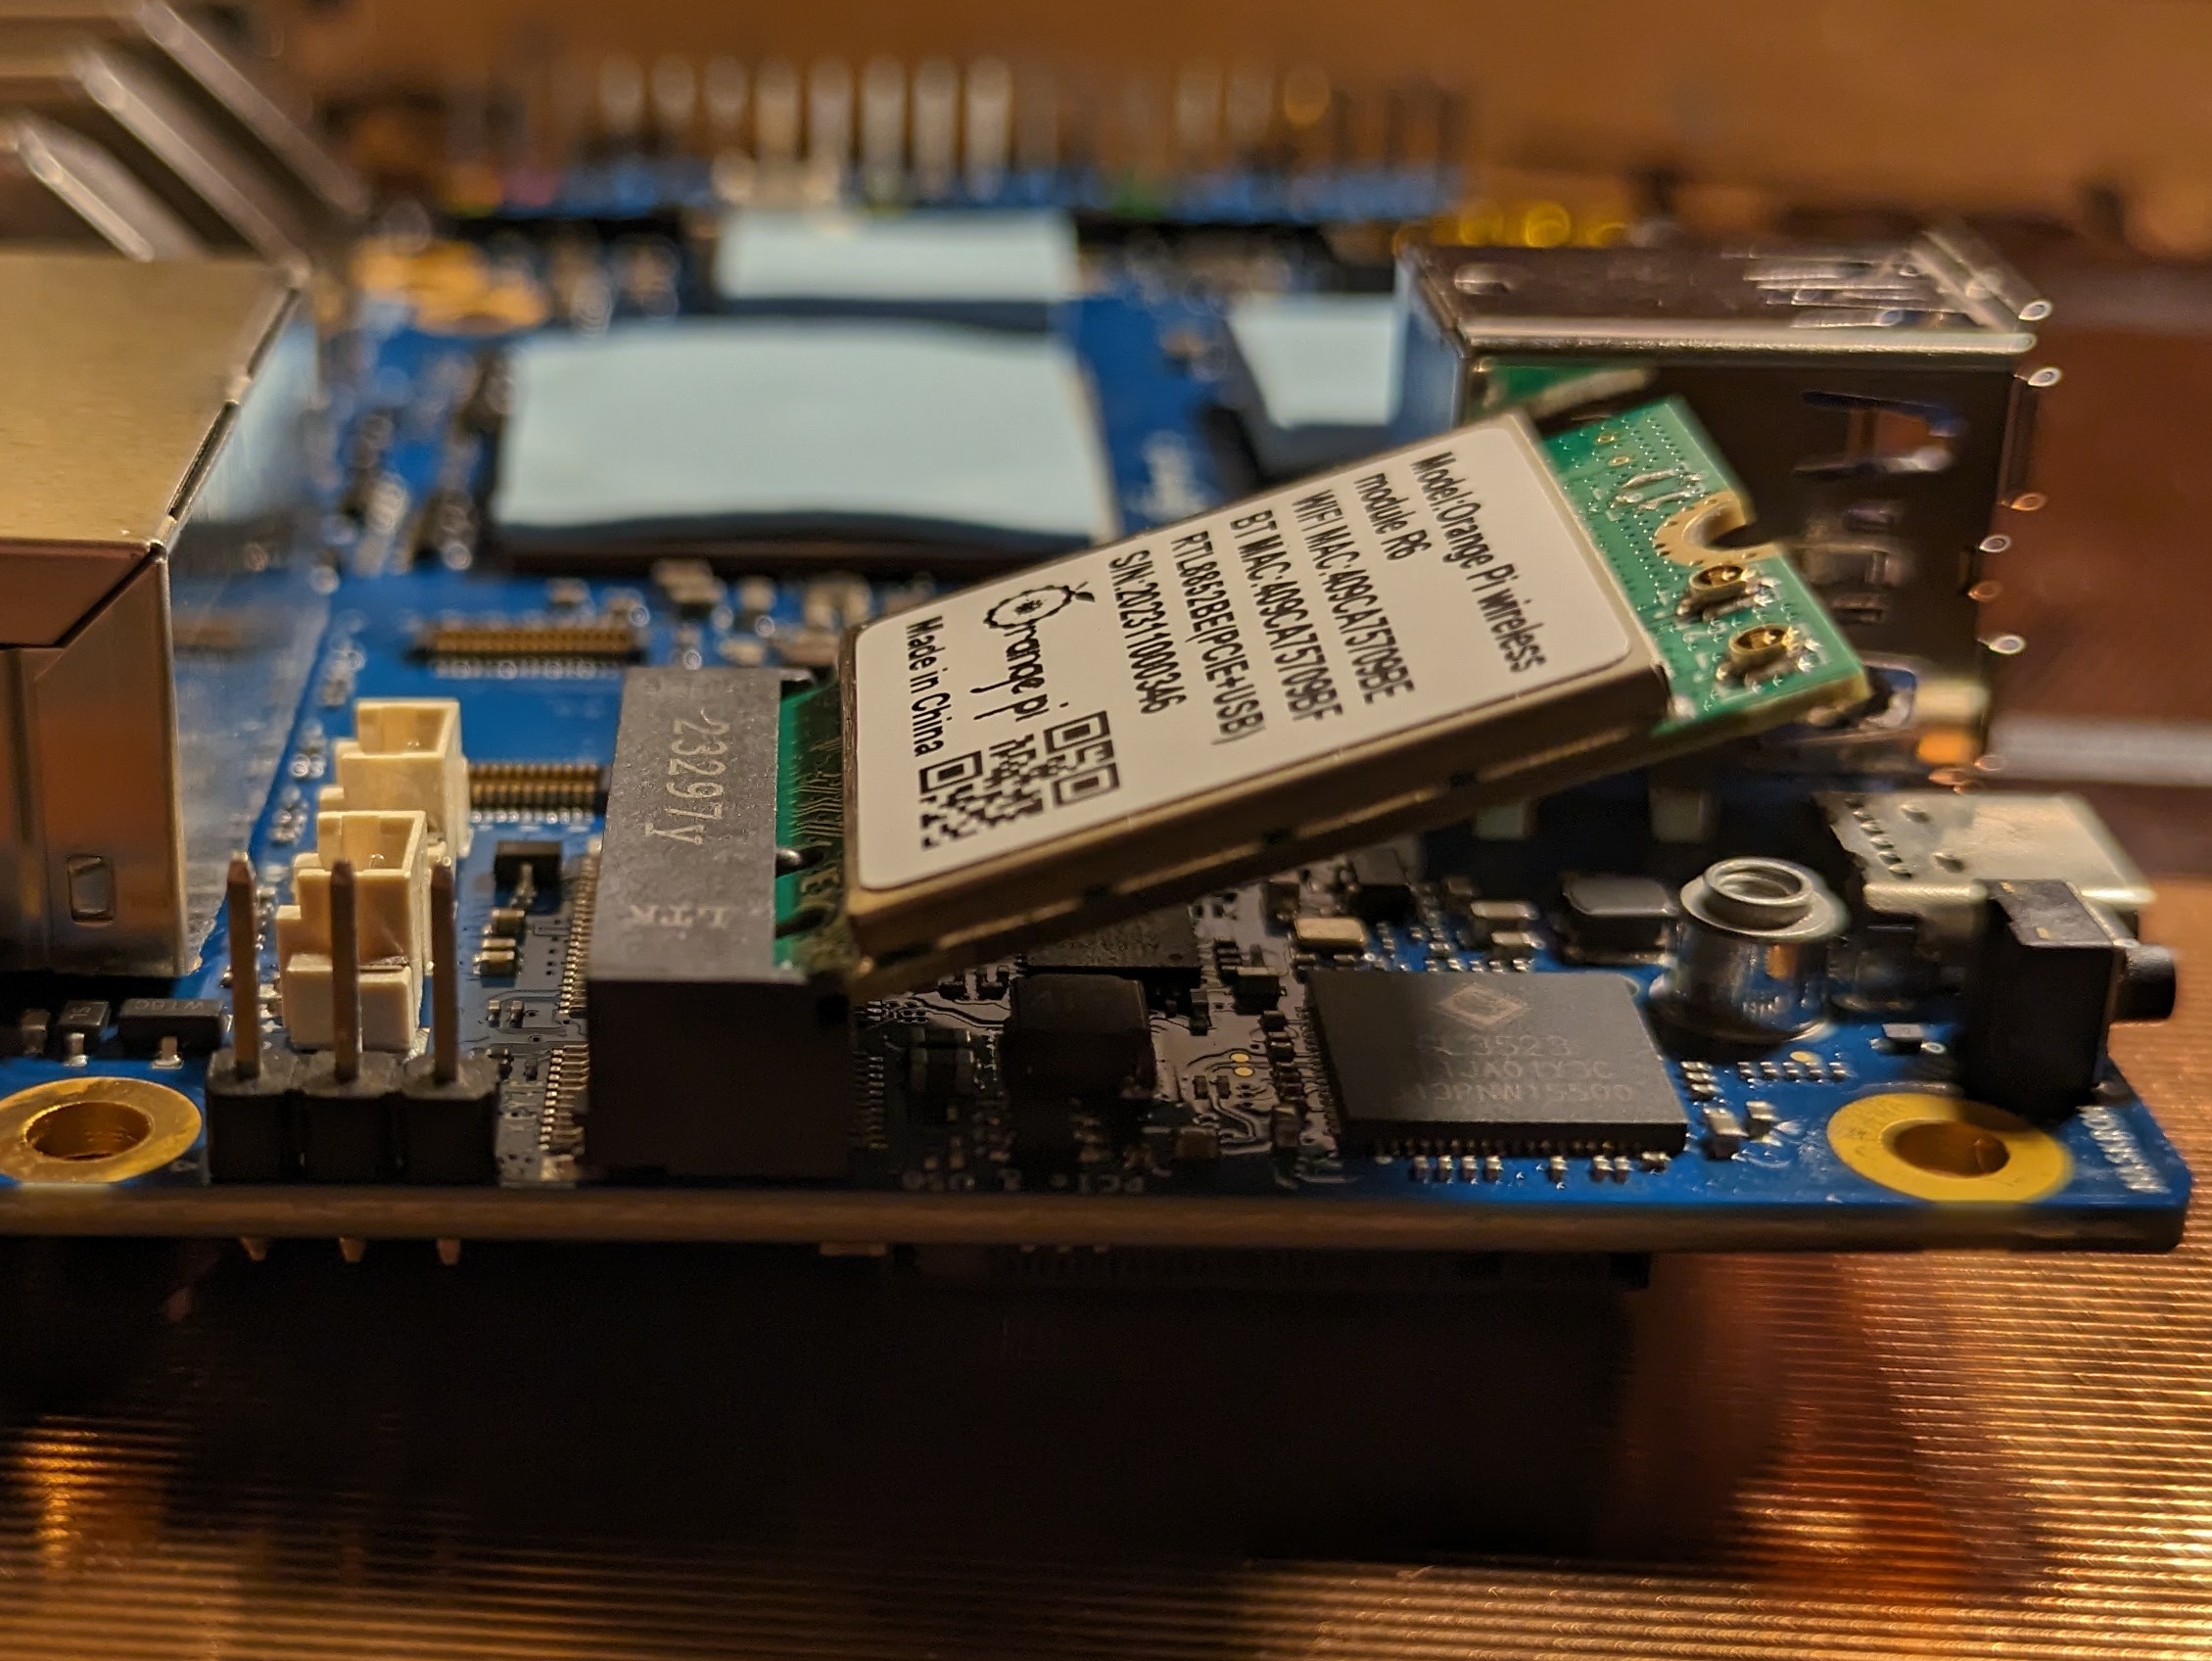
I know, my Wi-Fi wires aren't attached yet. Let's just say I figured this out the hard way.
Feb. 5, 2024, 4:51 p.m.
#OrangePi5+
JS Rotating Graphic
I prototyped this JS rotating Graphic for a presentation at work. See the link below for the live demo.
https://sites.google.com/view/music-tech-sota/content-spheres
Feb. 5, 2024, 4:51 p.m.
#JS #JavaScript
Orange Pi 5+
I purchased and Orange Pi 5+ (16GB) to see what I could do with it. I have it set up now, and will eventually use it to host this micro blog. [UPDATE - the website you are now viewing is currently host on the OrangePi5+ you see here!]
I bought it on Amazon, see affiliate link if you want one. Also I bought the Aluminum case which turned out to be a very nice sturdy case. It couples to the cpu with a kind of thermal adhesive pad, effectively turning the entire aluminum case into a heat sink/dissipator.
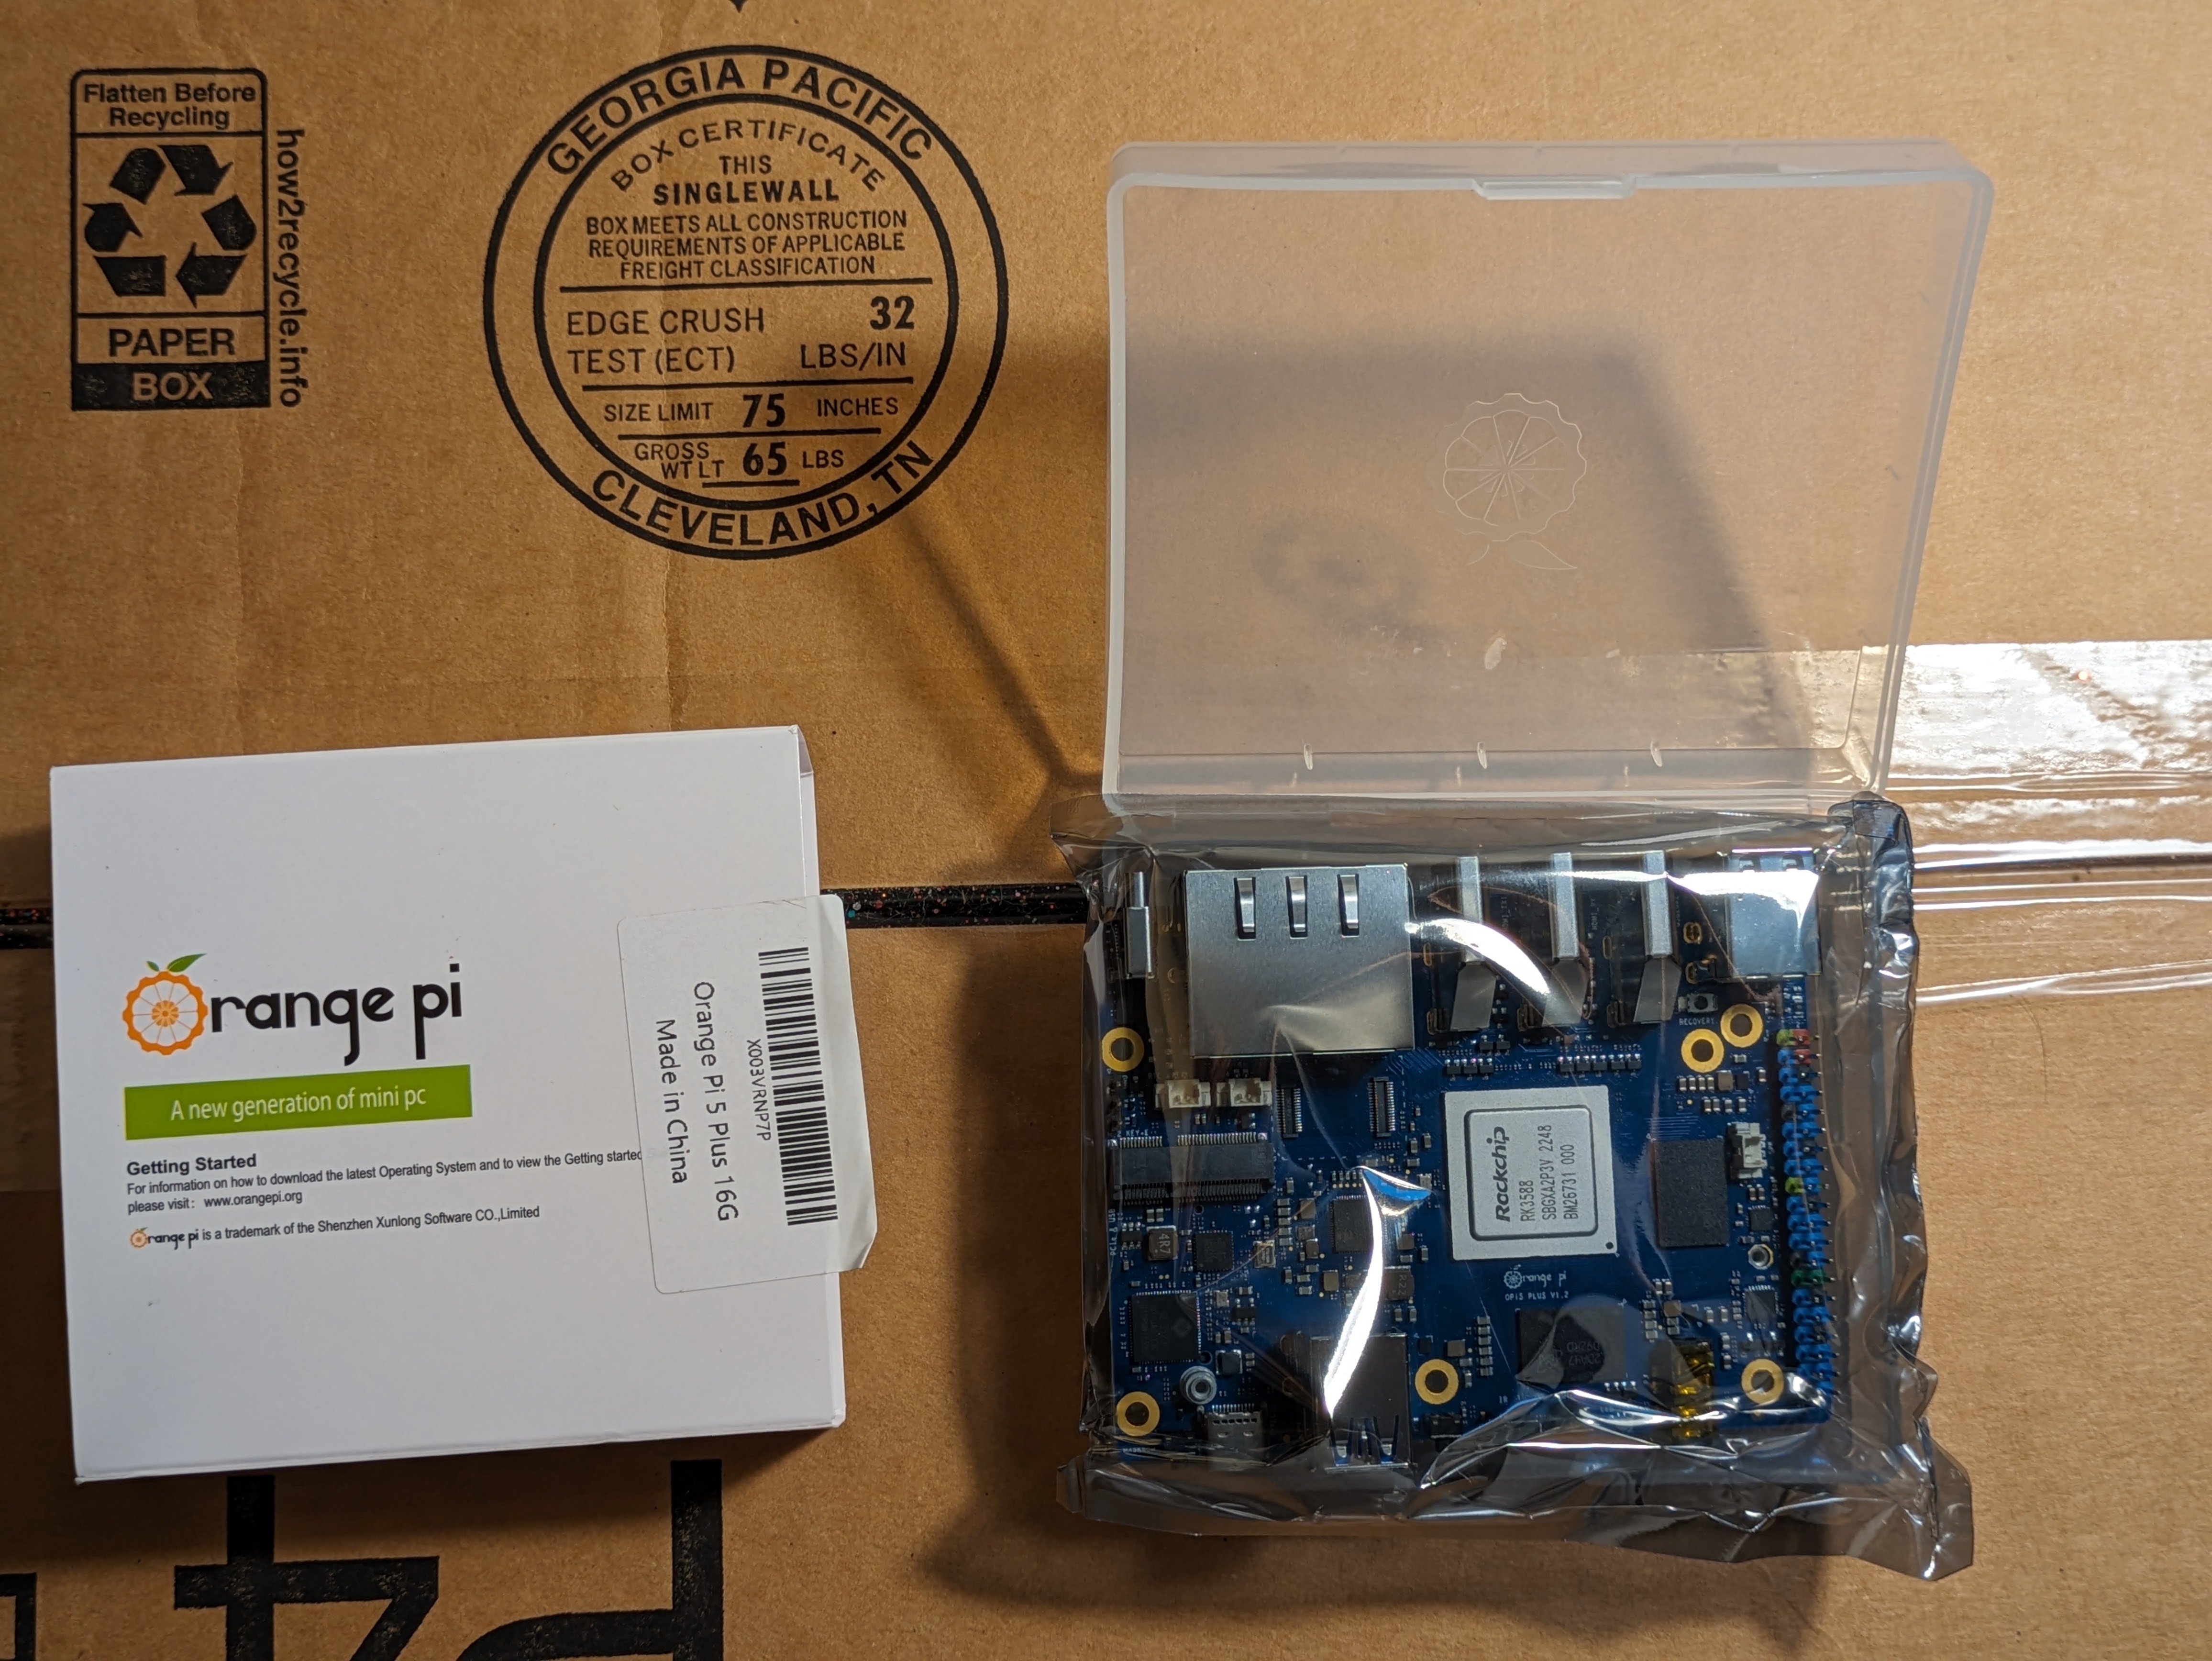
Unboxing
OrangePi Store
Feb. 5, 2024, 4:51 p.m.
#OrangePi5+
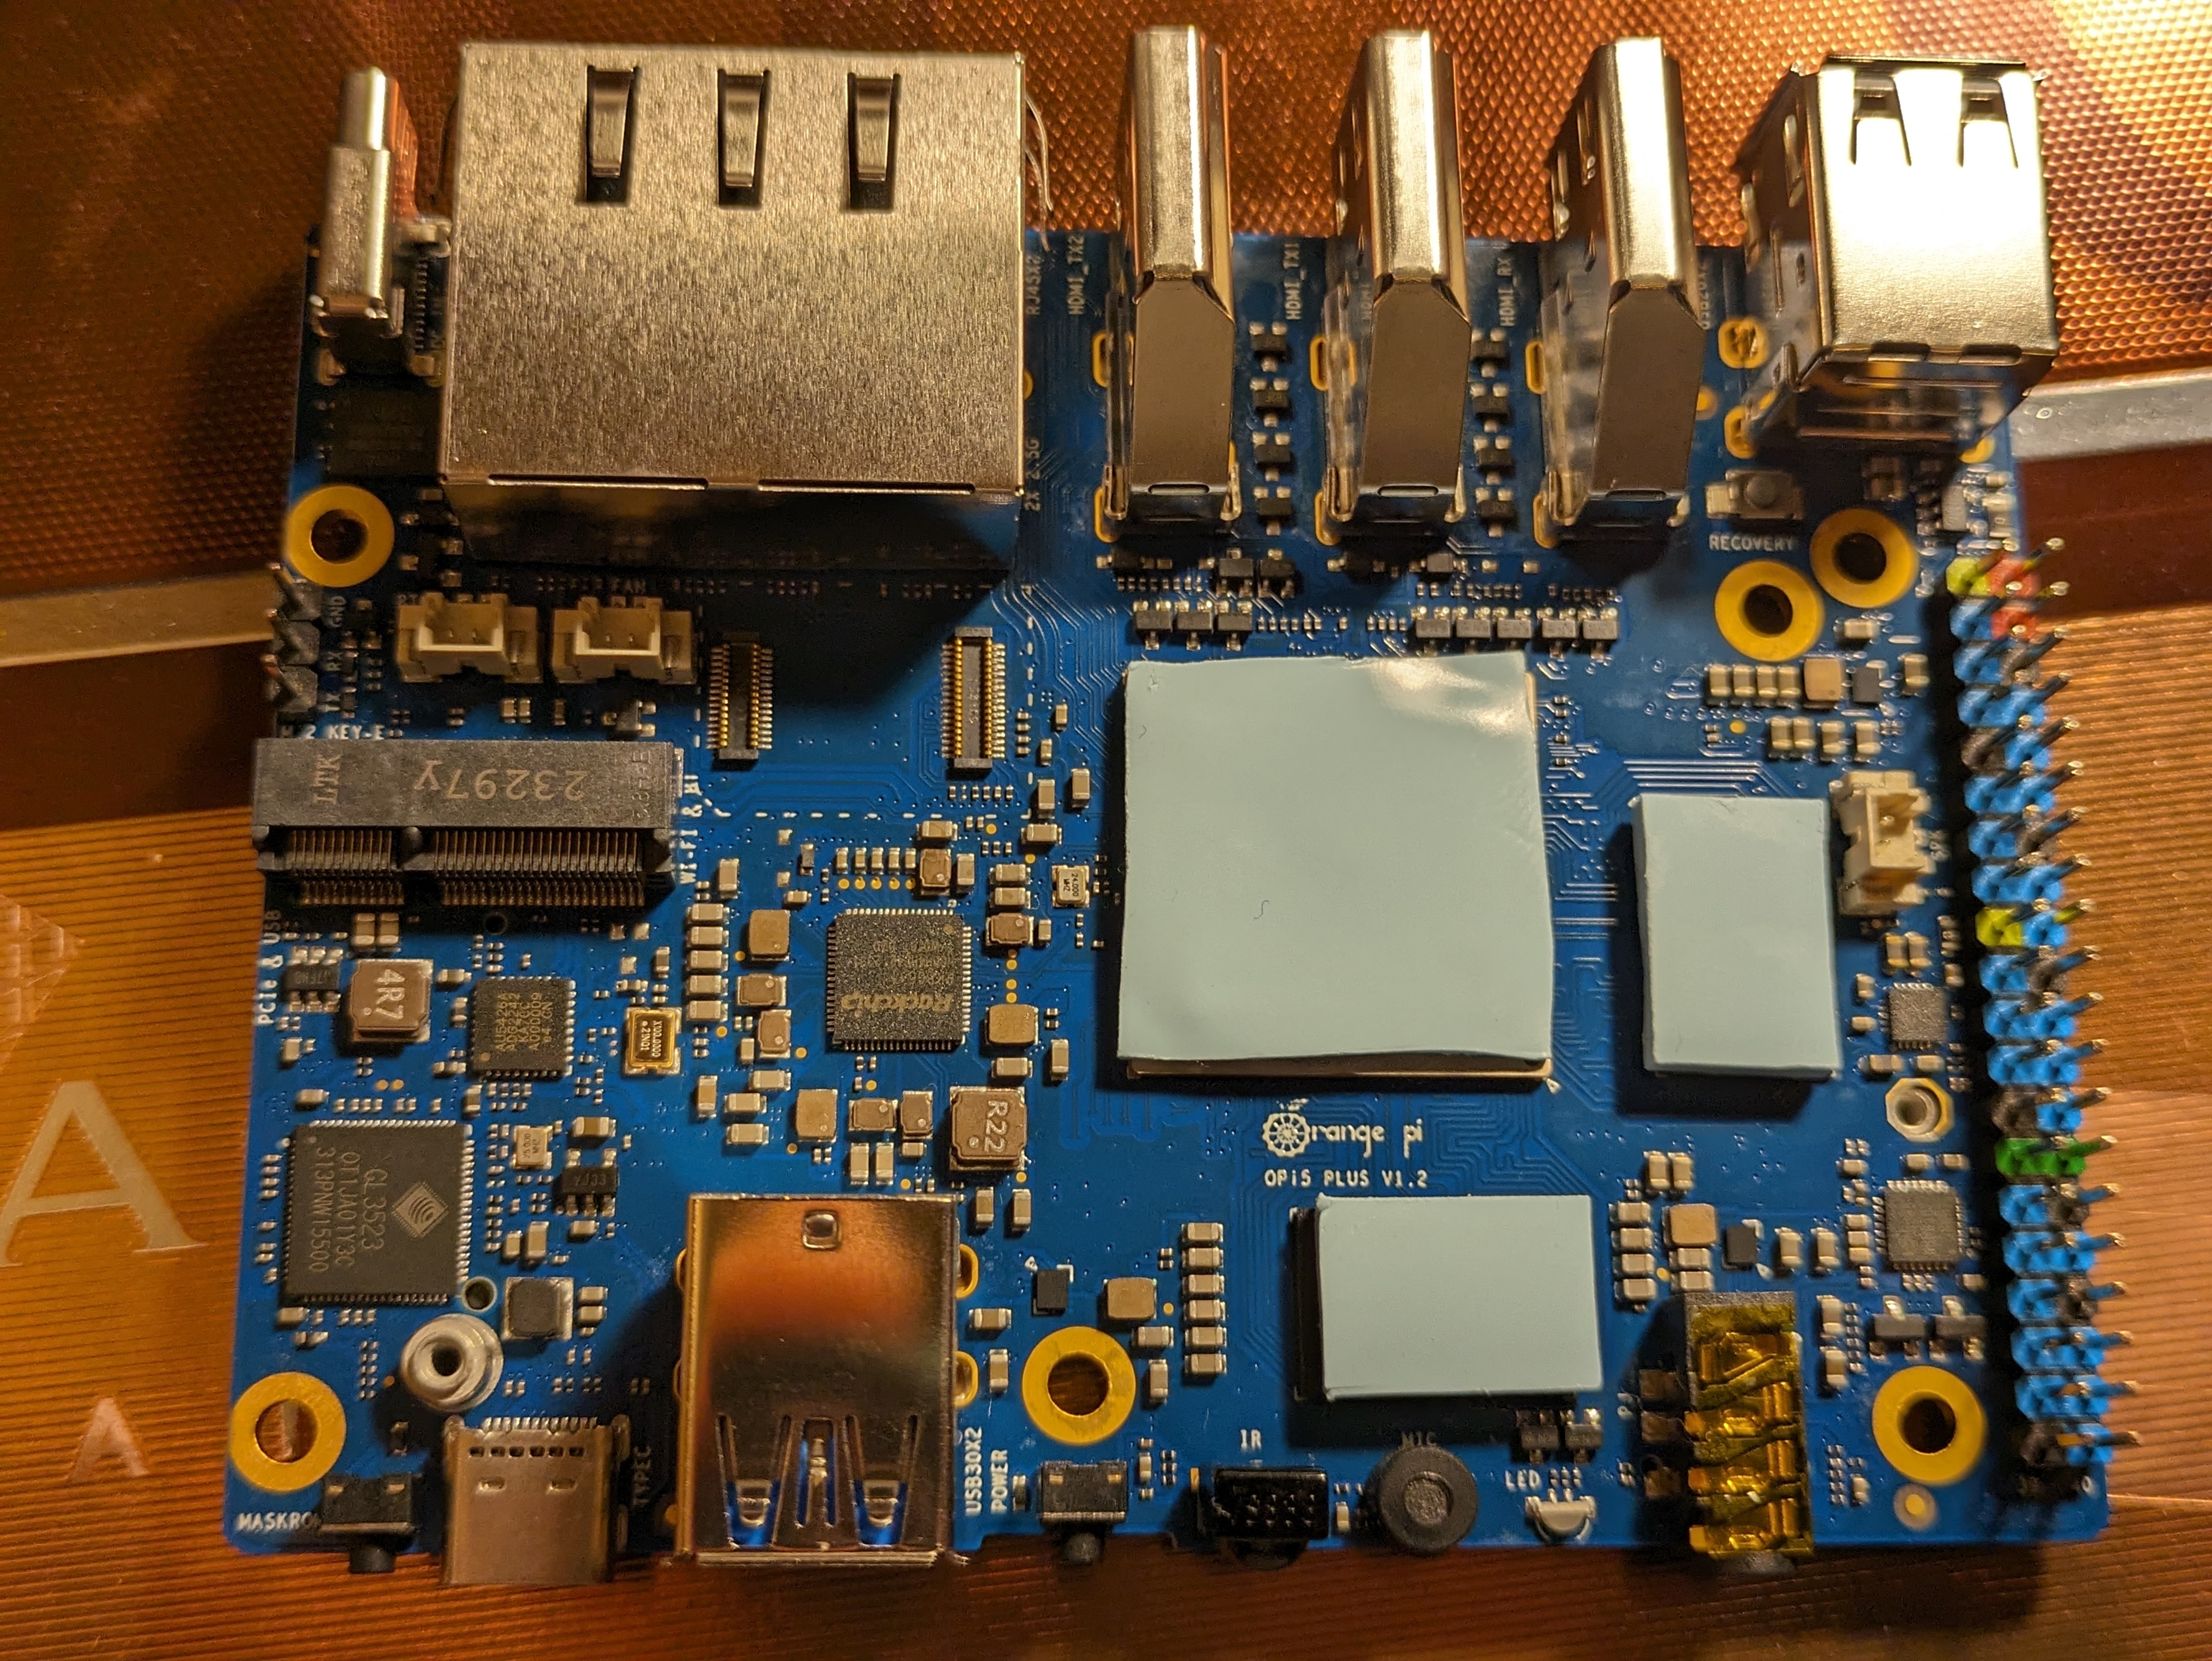
OrangePi 5+ Assembly step 2
Go ahead and carefully add the thermal pads to the cpu and ram chips. These are included with the board or the case, not sure which. These will come into contact with the case when it is closed to transfer heat away from the CPU and RAM to the heat dissipating case.
Feb. 5, 2024, 4:51 p.m.
#OrangePi5+
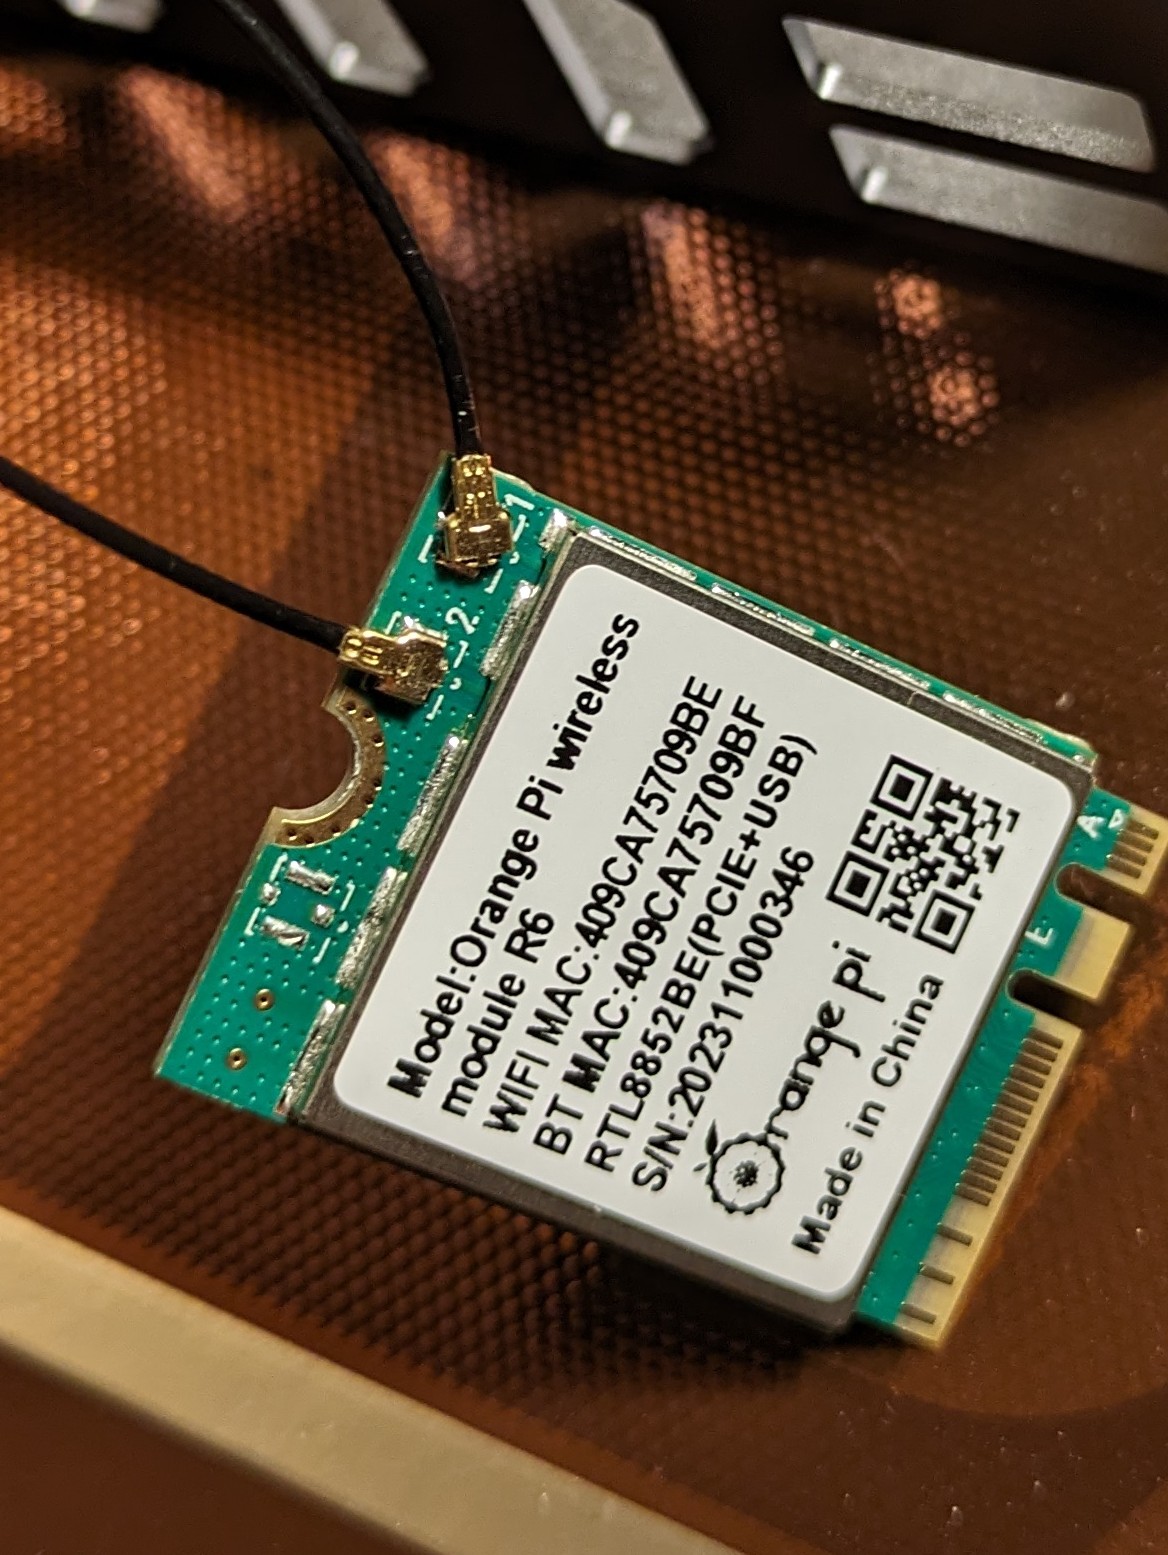
OrangePi 5+ Assembly step 3
Next we will want to attach the antennae wires to the WiFi module before we insert it into the M.2 E+KEY. They snap on, but it's a very tight fit. You may want to use a flat plastic tool like a guitar pick to be able to apply enough pressure to these tiny connections. If you use needle nose pliers be careful not to squeeze to hard. We don't want to break the board!
Feb. 5, 2024, 4:51 p.m.
#OrangePi5+
OrangePi 5+ Assembly step 5
Now we're ready to insert the board into the case. Go ahead and slip the power button into place first. It goes in from the inside of the case! Place the lid of the case face down. You will see the correct orientation of the board in the case by thermal pads alignment with the aluminum blocks as well as the location of the port holes. Be sure to arrange the WiFi wires so that they DO NOT come between the thermal pads and the case.
Feb. 5, 2024, 4:51 p.m.
#OrangePi5+
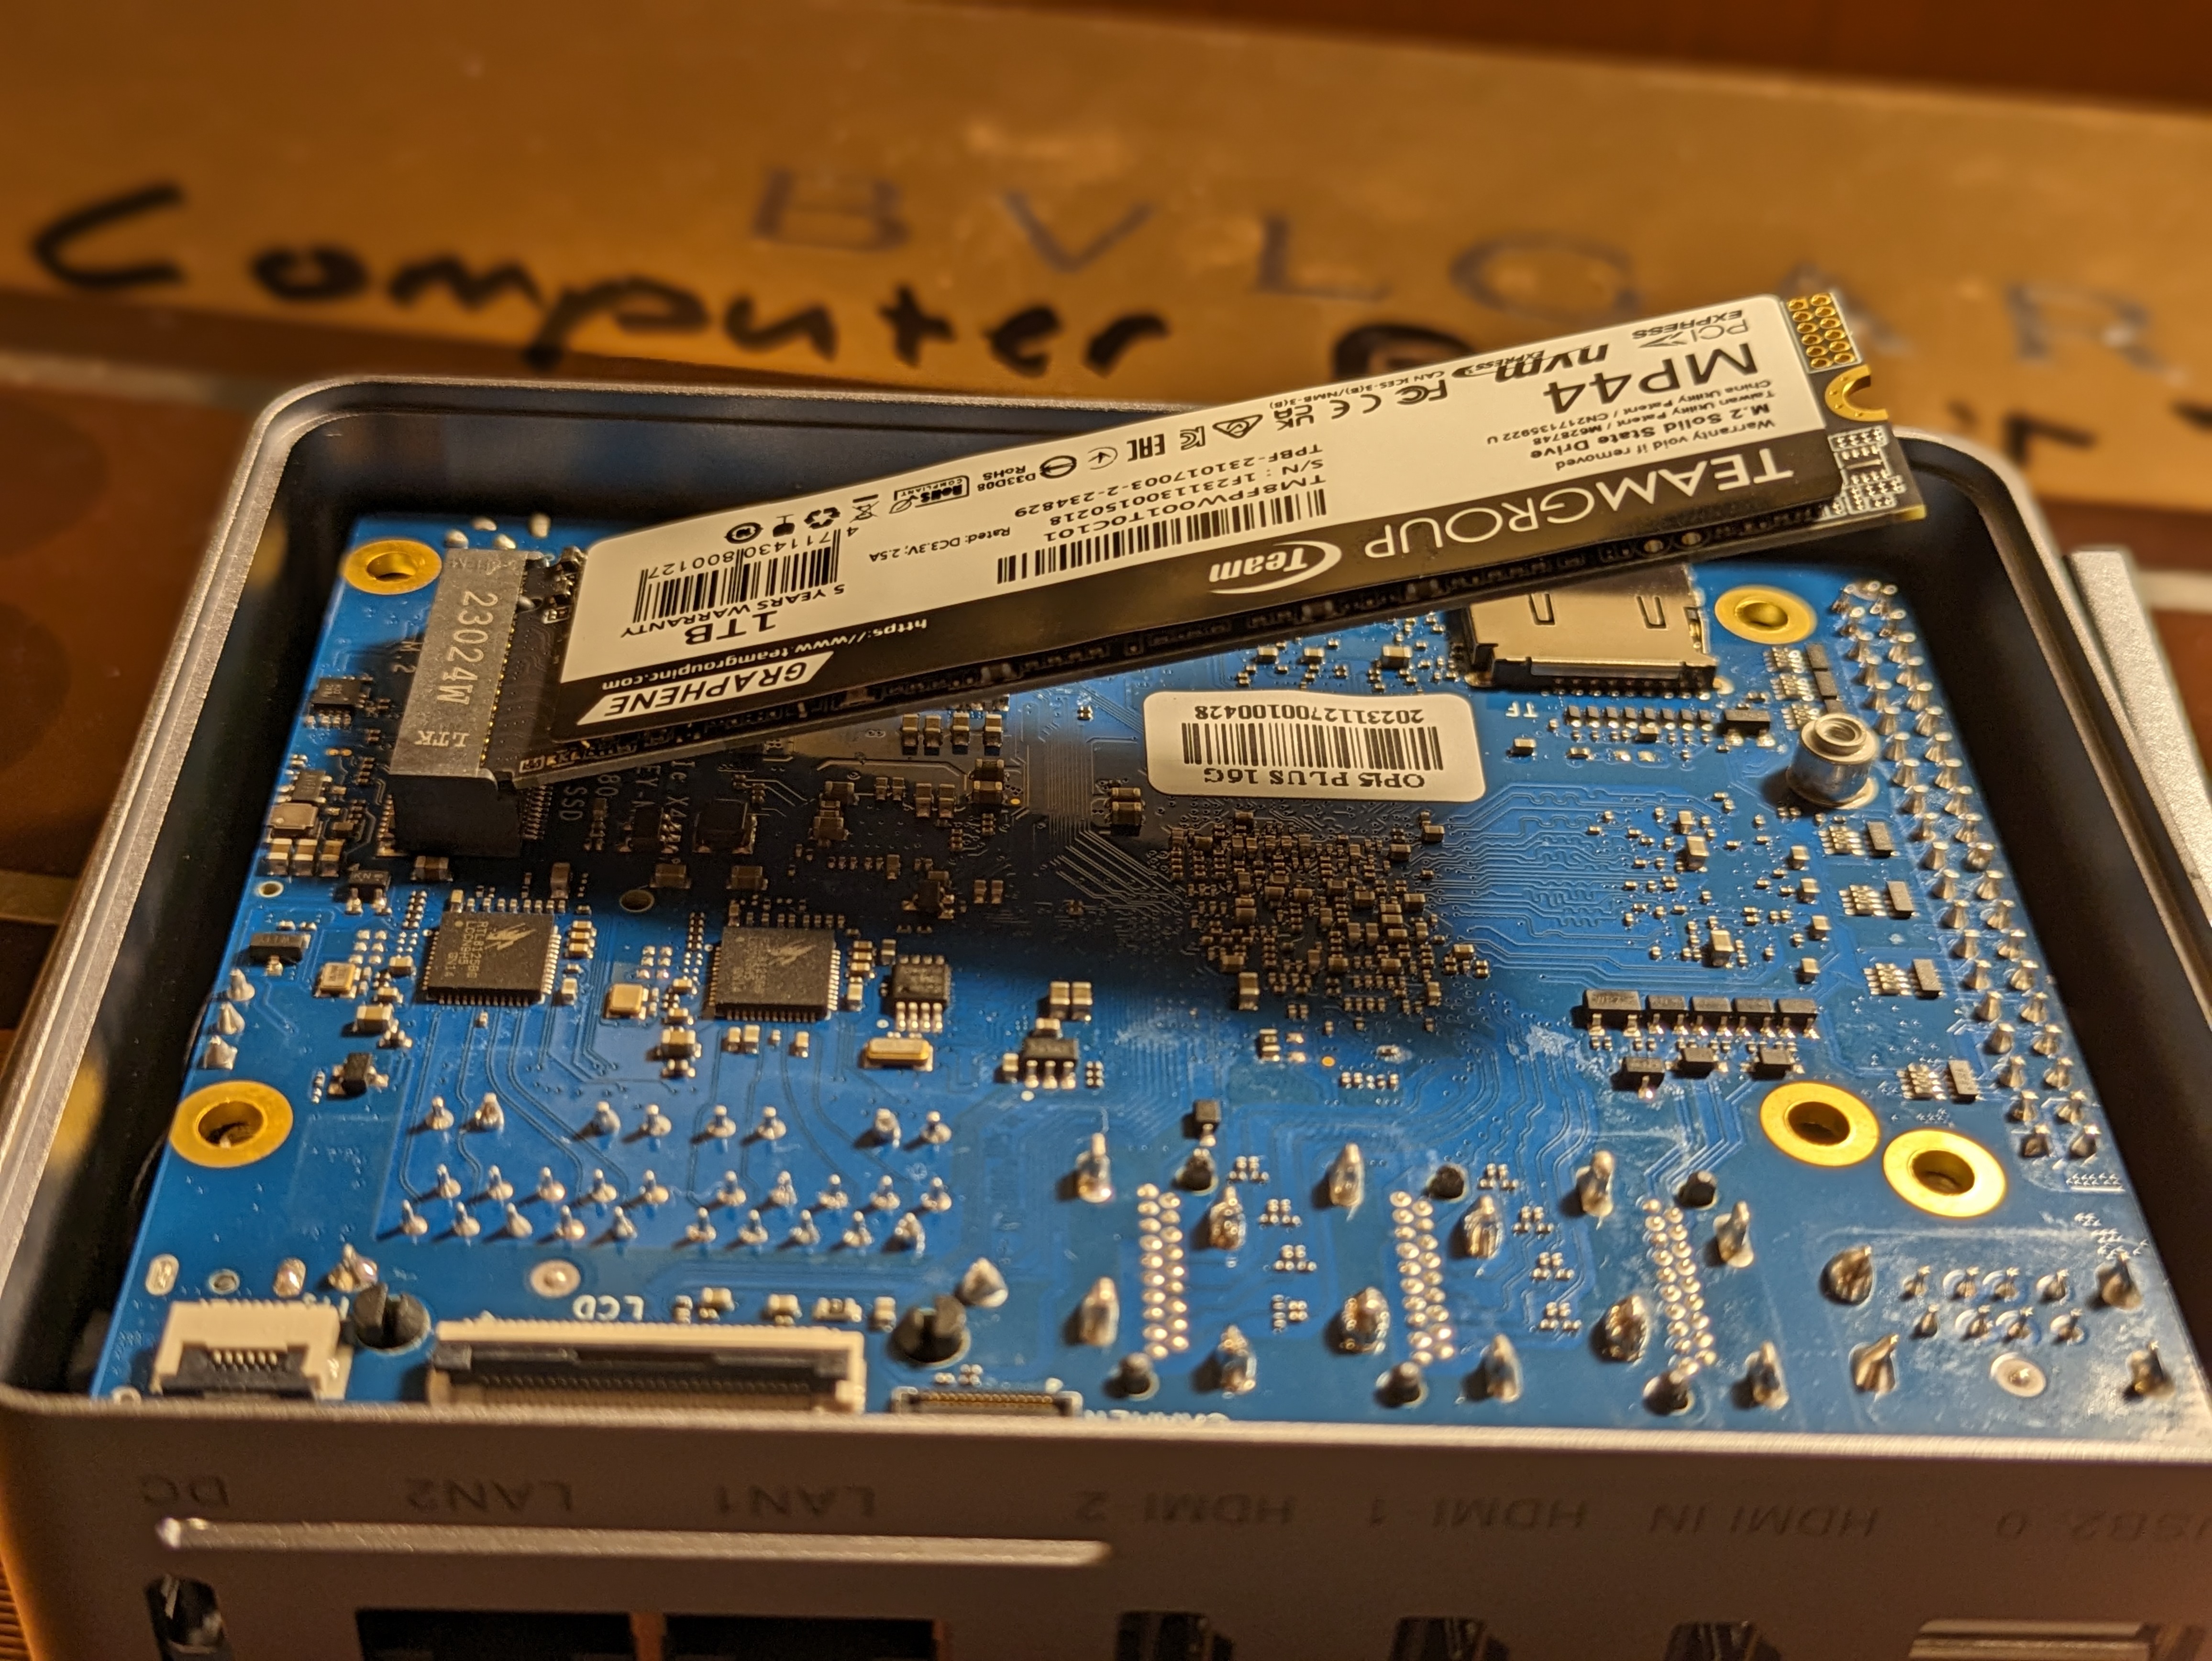
OrangePi 5+ Assembly step 6
So now we have the board in the case with the bottom of the board facing up. Here we can install an NVME ssd. Be advised, it does not come with a screw to hold this into place, although there is a hole for a screw. I found a screw in my workshop that worked for me. Also, it probably doesn't really need it. Insert the NVME ssd at an angle. Press it down and put the bottom of the case on. It should be locked into place once it it pushed down flat.
Feb. 5, 2024, 4:51 p.m.
#OrangePi5+
